Premium Gate Installation Steps for Secure, Stylish LA Homes
By BabyLoveGrowth
Picture a Beverly Hills property where a custom wrought iron gate frames the driveway with elegant precision, quietly opening as the homeowner’s vehicle approaches. That level of security and curb appeal doesn’t happen by chance. Improper gate installation, whether through skipped permits, incorrect post depth, or uncalibrated automation, can reduce your property value, create serious safety hazards, and lead to costly repairs within the first year. This guide walks you through every essential step of premium gate installation, from initial planning and code compliance to final safety verification, so your investment delivers lasting results.
Table of Contents
- What you need before starting: Planning, codes, and requirements
- Essential tools and materials for premium gate installation
- Step-by-step gate installation process: From foundation to setup
- Testing, verification, and final walkthrough
- Why premium gate installations demand expert attention
- Get a custom quote for your premium gate
- Frequently asked questions
Key Takeaways
| Point Details | |
| Plan thoroughly | Careful planning and checking codes are essential to avoid costly mistakes with premium gates. |
| Use the right materials | High-quality materials and modern access controls ensure security and style for affluent LA homes. |
| Follow safety standards | Installing at least two types of safety devices is mandatory for automated gates under UL 325. |
| Test before finishing | Comprehensive testing and verification catch issues early and guarantee smooth operation. |
| Expert help matters | Expert installation blends luxury, technology, and safety for the best long-term value. |
What you need before starting: Planning, codes, and requirements
Before getting hands-on, it’s essential to prepare with the right knowledge, legal requirements, and a clear plan. Rushing into installation without this groundwork is one of the most common mistakes homeowners make, and in Los Angeles, it can mean costly permit violations or forced removal of a newly installed gate.
Site measurement and survey are your starting point. You need precise measurements of your driveway width, slope, and any underground utilities before selecting a gate type. A gate that looks right on a showroom floor may not function correctly on a sloped driveway without special hardware and motor calibration.
Los Angeles has specific requirements for gate height, setbacks, and design depending on your zoning district. Understanding fence height rules in your area is critical before finalizing your design. Many HOAs in neighborhoods like Bel Air, Pacific Palisades, and Hancock Park add another layer of design approval, sometimes requiring specific materials, color palettes, or architectural styles that complement surrounding properties.
Choosing between an automated and manual gate, or between a swing and slide configuration, affects everything from foundation requirements to electrical planning. Slide gates work well on level driveways with space along one side, while swing gates need clear arc clearance in front of and behind the pivot points. For automated installations, UL 325 and ASTM F2200 are the core safety standards governing operator safety and gate construction. These are not optional guidelines; they are the industry baseline for compliant residential installations.
Pro Tip: Schedule a conversation with your HOA and neighborhood association before submitting any permit applications. Many associations have a preferred review process, and knowing their specific preferences early can shave weeks off your approval timeline.
Key documents and requirements to gather before installation:
- City of Los Angeles building permit (required for most automated gates)
- Survey or site plan showing setbacks and property boundaries
- HOA design approval letter if applicable
- Electrical permit for automated systems with motor and wiring
- Engineering specs for posts and foundation if gate exceeds certain weight thresholds
- Manufacturer’s installation documentation for automation components
Thorough preparation in this phase protects securing your property as a long-term investment rather than a short-term cosmetic upgrade.
| Requirement Manual gate Automated gate | ||
| Building permit | Often required | Always required |
| Electrical permit | Not needed | Required |
| HOA approval | Varies | Varies |
| UL 325 compliance | Not applicable | Mandatory |
| Engineering review | Rarely needed | Sometimes required |
Essential tools and materials for premium gate installation
With proper preparation in place, ensure you have all the right tools and materials before breaking ground. Attempting a premium installation with substandard components is a shortcut that shows up immediately in performance and longevity.
Premium materials commonly used in LA luxury gate installations include:
- Wrought iron: Timeless aesthetic, high durability, requires powder coat or rust-resistant finish for coastal climates
- Tubular steel: Strong, versatile, and compatible with most automation motors
- Aluminum: Lightweight and rust-resistant, ideal for slide gates where motor load matters
- Hardwood or composite: Used for privacy panels combined with metal frames
- Concrete or steel-reinforced posts: Foundation for all gate types, sized to gate weight
The automation hardware is equally important. Your motor, control board, and safety sensors must be matched to your gate’s weight and travel distance. Undersizing a motor leads to premature failure, particularly in the LA heat. For gate automation solutions, professional-grade components consistently outperform consumer-grade alternatives in both reliability and safety compliance.
Smart add-ons are increasingly standard in premium LA properties. Vehicle loop detectors embedded in the driveway pavement trigger the gate to open automatically as your car approaches. Video intercoms with two-way communication, RFID readers, and smartphone-based remote access all route through the gate’s control board. As outlined in the access control system setup, these components must be designed and located so the trigger signal reliably reaches the gate’s control board while maintaining safety compliance.
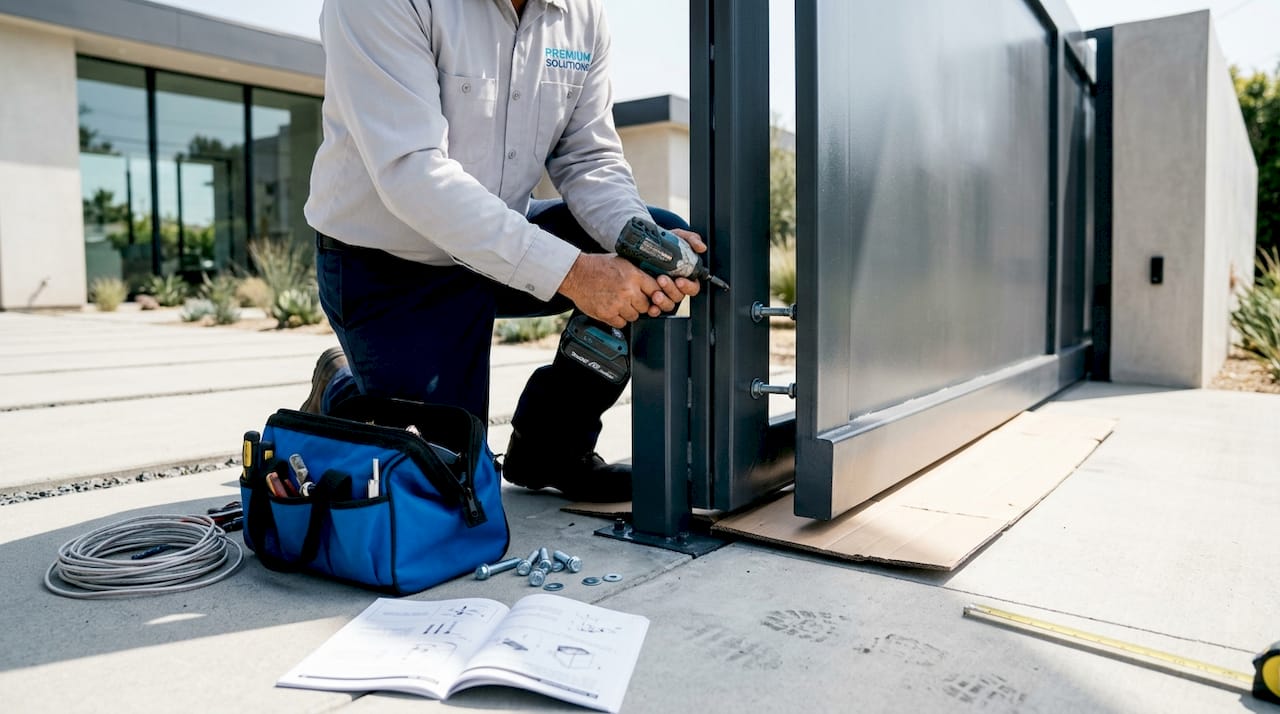
Statistic worth noting: UL 325 requires at least two entrapment protection devices per entrapment zone on residential automated gates. This means every compliant automated gate needs redundant safety coverage, not a single sensor.
Reviewing your gate access control options early helps you plan conduit routing and power supply locations before posts are set, which saves significant rework.
Essential tools for installation:
- Laser level and digital measuring tape
- Post hole digger or auger (hydraulic preferred for LA caliche soil)
- Concrete mixer or pre-mixed concrete supply
- Wire strippers, conduit bender, and fish tape for electrical runs
- Torque wrench set for hinge and hardware bolting
- Multimeter for voltage verification on automation circuits
- Angle grinder and welding equipment for custom metalwork
| Component Entry-level Premium/recommended | ||
| Gate motor | Chain-drive, residential | Hydraulic or high-cycle swing operator |
| Safety sensor | Single beam sensor | Dual entrapment device set (UL 325 compliant) |
| Access control | Keypad only | Keypad, remote, intercom, and vehicle detector |
| Finish | Standard paint | Powder-coated, UV-resistant for LA climate |
| Power backup | None | Battery backup module integrated in control board |
Step-by-step gate installation process: From foundation to setup
With materials in place, you’re ready to tackle the actual installation, step by step. Each phase builds on the one before it, and skipping or rushing any step creates problems that are expensive to correct after the fact.
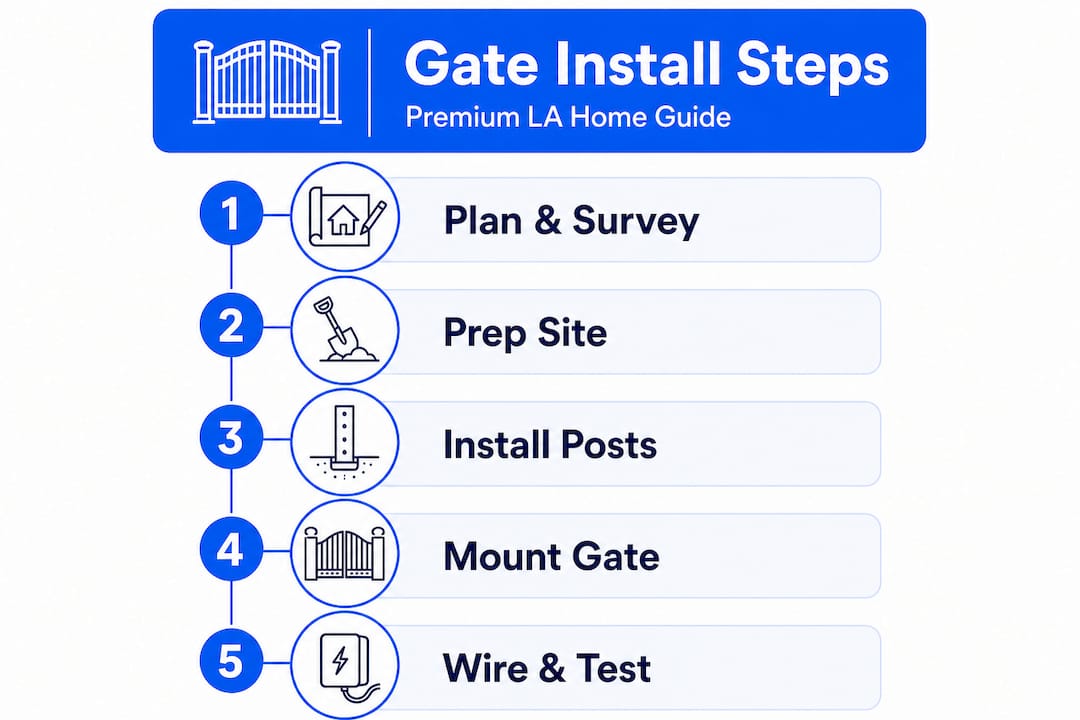
- Site preparation: Mark all utility lines, clear vegetation, and confirm final gate placement. Stake out post locations and verify alignment with a string line.
- Excavating and setting posts: Dig post holes to the required depth based on gate weight (typically 36 to 48 inches for heavy ornamental iron gates). Mix and pour concrete, ensuring posts are plumb. Allow a full 72-hour cure time before proceeding.
- Mounting hardware and hinges: Install hinge plates, latch assemblies, and any embedded anchor bolts per manufacturer specifications. Torque all fasteners to spec.
- Hanging the gate panel: Hang the gate on its hinges or track rollers. Check swing arc or slide travel for clearance on all surfaces. Adjust hinge positions to eliminate sag.
- Electrical rough-in: Route conduit from the main power source to the gate operator location. Install a dedicated 20-amp circuit for most residential swing operators. Pull wire before finishing any concrete flatwork.
- Installing the automation operator: Mount the motor and control board per manufacturer instructions. Connect power, limit switches, and safety device wiring.
- Programming automation settings: Set open and close limits, adjust motor speed, and configure any timer-to-close function. Input codes for keypads and pair remotes.
- Installing and verifying safety devices: Mount photo eyes, edge sensors, or loop detectors per UL 325 entrapment protection requirements, which mandate at least two entrapment protection devices per direction of travel for residential operators.
Safety notice: Per ASTM F2200, all automated pedestrian and vehicular gates must be designed and maintained to prevent entrapment and pinch-point injuries. Any gap between gate panels, posts, or the ground that could trap a child’s head, neck, or limbs must be designed out of the gate structure or guarded with compliant materials.
Understanding premium security gate types helps you anticipate the unique installation requirements for each configuration before you begin. Budgeting accurately is equally important; reviewing LA gate installation costs before you finalize your material choices prevents budget surprises mid-project.
| Installation phase Typical time Skill level required | ||
| Site prep and layout | 2 to 4 hours | Moderate |
| Post excavation and setting | 4 to 8 hours | High |
| Gate hanging and hardware | 3 to 6 hours | High |
| Electrical rough-in | 4 to 8 hours | Licensed electrician |
| Automation programming | 1 to 3 hours | Specialized technician |
| Safety device calibration | 1 to 2 hours | Specialized technician |
It’s also worth avoiding common installation mistakes that apply equally to gate systems, such as inadequate weatherproofing of electrical connections and improperly secured mounting hardware.
Pro Tip: Test every access control method, including keypad, remote, intercom call button, and vehicle detector, at least five times each before signing off on the installation. Intermittent failures under real-world conditions are far easier to diagnose before landscaping and paving cover your conduit runs.
Testing, verification, and final walkthrough
After installation, thorough testing and verification ensure lasting satisfaction and peace of mind. This phase is not a formality. It’s where problems get caught before they become safety incidents or warranty disputes.
Begin by running the gate through its full range of motion repeatedly, checking for hesitation, grinding sounds, or irregular speed. Activate the auto-reverse function by placing a solid object in the gate’s path. A properly calibrated system will detect the obstruction and reverse direction immediately. If the gate pushes through or responds slowly, recalibrate the motor’s force settings.
Safety verification checklist:
- Confirm both entrapment protection devices respond accurately
- Verify auto-reverse activates within the required force limits
- Test battery backup by disconnecting main power and cycling the gate
- Check that all remote controls and keypads function at full rated range
- Verify the gate holds position on the driveway slope without drift
- Inspect all welds, fasteners, and hinge points for signs of stress or misalignment
- Test the manual release function for emergency access during power outages
Compliance with UL 325 standards is not a one-time check. Residential operators require at least two different types of entrapment protection devices per direction of travel, and both need to function correctly every time the gate cycles.
Final alignment adjustments often require small shims at hinge plates or minor track adjustments for slide gates. Take the time to get this right. A gate that drags or catches will wear its hardware far faster and reduce motor lifespan.
Schedule your first post-installation inspection within 90 days. After that, plan on seasonal checkups and at least one full service call per year, covering lubrication of rollers and hinges, firmware updates for smart controls, and a safety device function test. For guidance on maintaining your gate system over the long term, develop a maintenance calendar with your installer from day one.
Pro Tip: Create a simple document that records your gate’s serial numbers, control board settings, access codes (stored securely), and your installer’s direct contact. Keep it in a safe place and share it with anyone who may need to service the gate in the future.
When everything is done correctly, the result speaks for itself: a gate that opens quietly and precisely, integrates seamlessly with your smart home, and adds genuine curb appeal to one of your largest investments. Reviewing your fence cost estimation alongside your actual project helps you confirm that every dollar was well spent.
Why premium gate installations demand expert attention
Here’s a perspective that challenges a common assumption: even experienced DIYers who have tackled complex home improvement projects frequently underestimate what premium gate installation actually requires. It’s not just a mechanical project. It’s the intersection of structural engineering, low-voltage electrical work, safety compliance, and design aesthetics, all in one system.
We see it regularly. A homeowner installs a gate that looks beautiful but has only one safety sensor instead of the required two, or has posts set just two feet deep in caliche soil that shifts seasonally. The gate works fine for six months, then begins to fail in ways that seem mysterious until a trained technician traces it back to the foundation or a non-compliant safety device.
The complexity of smart gate installation adds another dimension entirely. Pairing a gate operator with a smartphone app, integrating it with a home automation system, and ensuring the vehicle detector doesn’t false-trigger from street traffic requires programming knowledge and hands-on calibration that goes well beyond following a manual.
Local expertise also matters in ways that aren’t obvious. An installer who works regularly in West Hollywood knows which permit reviewers need additional documentation. One who has done dozens of installations in the Pacific Palisades understands how coastal salt air affects hardware selection. That kind of accumulated local knowledge simply isn’t available in a generic installation guide.
Long-term, the math strongly favors professional installation. The cost of correcting a non-compliant or poorly executed installation typically exceeds the cost difference between professional and DIY from the outset. More importantly, a properly installed gate from day one protects both your family and your property value without interruption.
Get a custom quote for your premium gate
Your gate project is as unique as your property. The combination of your driveway layout, design preferences, automation requirements, and local code expectations means that accurate planning requires real, localized expertise.
At fence-gate-estimator.com, we make it easy to get a clear picture of what your installation will cost and what it will involve. Use our instant estimator to explore options for automated gate installation and custom fencing quotes tailored to your specific property. Our platform uses current Los Angeles labor and material rates to generate realistic estimates, and our team is ready to connect you with vetted local professionals who specialize in premium residential gates. Get a premium gate estimate and take the next step toward the security and curb appeal your home deserves.
Frequently asked questions
What safety requirements apply to automated gates in the US?
All automated vehicular gates must comply with UL 325 and ASTM F2200 safety standards, which govern operator safety and the physical construction and installation of the gate itself.
How many safety devices are required for a residential automatic gate?
UL 325 requires at least two different types of entrapment protection devices for each entrapment zone per direction of travel on residential automated gate operators.
What’s the difference between a slide and a swing gate?
Slide gates roll horizontally along a track parallel to the fence line, while swing gates pivot open like a door. Your choice depends on available lateral space alongside the driveway and the grade of your approach.
Which access controls can be integrated with automated gates?
Keypads, remotes, card readers, vehicle detectors, and video intercoms can all be integrated, with each interface designed so its trigger signal reaches the gate control board reliably while maintaining full safety compliance.
How often should premium gates be maintained after installation?
Premium gates should be inspected every season for visible wear and lubrication needs, with a full professional service including safety device testing performed at least once per year to maintain optimal performance and longevity.