Mixed Material Fence Design Steps for LA Homeowners
By BabyLoveGrowth AI
A mixed-material fence succeeds when you assign each material a clear structural role before you buy a single board or post. Here is the ordered checklist to follow from first decision through contractor handoff:
-
Define purpose and scope: Decide whether the fence is primarily for privacy, security, or curb appeal, and identify which zones of your property need each function.
-
Verify property lines and permits: Commission a survey, then check LA County or your city’s planning department for height limits, setback rules, and HOA covenants before purchasing materials.
-
Assign material roles: Let metal (steel or powder-coated aluminum) carry the structural load as posts and frames; use wood, composite, or vinyl as replaceable infill; reserve stone or stucco for base or cap trim.
-
Survey the site and measure: Record every run length, height, slope change, and exposure (sun, salt air, sprinkler zones) on a simple measurement worksheet.
-
Size the structure: Calculate post spacing, footing depth, and reinforcement requirements, especially for wide or automated gates.
-
Design transitions and isolation details: Specify rubber gaskets, plastic spacers, and drainage gaps to prevent moisture entrapment and galvanic corrosion at every material interface.
-
Specify gates and hardware: Choose gate frames and hinges rated for the actual weight and use frequency; automated gates require a separate electrical permit in most LA jurisdictions.
-
Plan finish and maintenance: Schedule stain or coating cycles for wood, protective coatings for cut metal ends, and a first-year inspection checklist.
-
Build a cost and timeline estimate: Line-item materials, labor, permit fees, and gate hardware; add a 15–25% contingency for custom transitions or grading surprises.
-
Prepare a contractor spec package: Produce a two-page spec with dimensioned drawings and transition details so every installer bids on the same scope.
Table of Contents
- Why do homeowners choose mixed-material fencing?
- Which material combinations work best for your property?
- How to design a mixed-material fence: the full step-by-step process
- What structural rules keep a mixed-material fence standing?
- How do you make material transitions look intentional?
- What do permits, HOA approvals, and costs actually look like in LA?
- How long will each material last, and what maintenance does it need?
- What are the most common problems and how do you fix them?
- Materials compatibility and fastening quick-reference chart
- Key Takeaways
- What most homeowners get wrong about mixed-material fences
- Get an instant cost estimate for your Los Angeles fence project
- Useful sources and further reading
- FAQ
Why do homeowners choose mixed-material fencing?
Mixed-material fencing combines two or more materials in intentionally assigned roles: one handles structural demands, another delivers the visual finish, and a third may protect the base from splash or soil contact. The result is a fence that performs better than any single material could on its own.
The primary goals homeowners bring to this decision are privacy, security, curb appeal, and low long-term maintenance. In Los Angeles, a fourth driver is climate durability. The combination of intense UV, occasional coastal salt air in Santa Monica and Brentwood, and sprinkler-heavy landscaping in Bel Air and Encino creates conditions that punish untreated wood and uncoated steel alike. A well-designed fence upgrade addresses all four goals simultaneously.
Mixed-material fencing makes the most sense for long property runs where an all-wood fence would sag over time, for high-value homes in Beverly Hills or Pasadena where curb appeal directly affects property value, and for gates carrying heavy loads that require metal framing regardless of what the fence panels look like. The hybrid approach also lets you replace worn infill boards without touching the structural frame, which cuts long-term maintenance costs considerably.
LA homeowners are increasingly pairing metal frames with timber or composite infill because the combination satisfies both city permit requirements and HOA aesthetic standards while holding up to the region’s wind and seismic conditions. Premium neighborhoods across the city are seeing this hybrid style replace traditional all-wood fencing at a steady pace.
Which material combinations work best for your property?
Choosing the right pairing comes down to your exposure, maintenance tolerance, and budget. The combinations below cover the most common scenarios:
- Steel or aluminum frame + wood infill: The most popular choice for long runs and driveway gates. Metal provides structural rigidity while cedar or redwood delivers warmth. Keeping wood boards off grade by attaching them to a metal bottom rail dramatically reduces rot risk.
- Metal posts + horizontal wood slats: A modern aesthetic that works well in West Hollywood and Studio City contemporary homes. The horizontal orientation requires closer post spacing to prevent mid-span sag, but the look is clean and the wood stays drier.
- Composite or vinyl infill + metal frame: The lowest-maintenance combination for poolside or coastal exposures. Composite boards resist moisture and UV without annual sealing, making them a strong choice for properties near the water in Santa Monica or Culver City. For poolside privacy, pairing this with thoughtful privacy landscaping creates a layered, finished look.
- Stone or masonry base + wood or metal upper: High curb appeal and excellent splash protection. The masonry base keeps the wood or metal panels above the wet zone created by irrigation and mulch. Common in Pasadena and San Marino traditional-style properties.
- Aluminum-core composite + powder-coated aluminum frame: The best performer in high-UV, high-heat environments. Aluminum-core composite resists warping in the extreme heat common across the San Fernando Valley, including Sherman Oaks and Encino.
Key trade-offs to weigh before committing:
- Maintenance: Real wood requires staining or sealing every 2–3 years; composite and vinyl need only occasional washing.
- Initial cost: Metal frames and composite boards cost more upfront than wood-only fences, but the long-term replacement cost is lower.
- Visual cohesion: Mismatched finishes are the most common aesthetic failure; matching hardware color across all materials ties the design together.
- Thermal movement: Composite boards expand and contract with temperature changes and need designed expansion gaps at attachment points.
- Corrosion risk: Dissimilar metals in contact create galvanic corrosion; isolation hardware is non-negotiable where steel meets aluminum.
How to design a mixed-material fence: the full step-by-step process
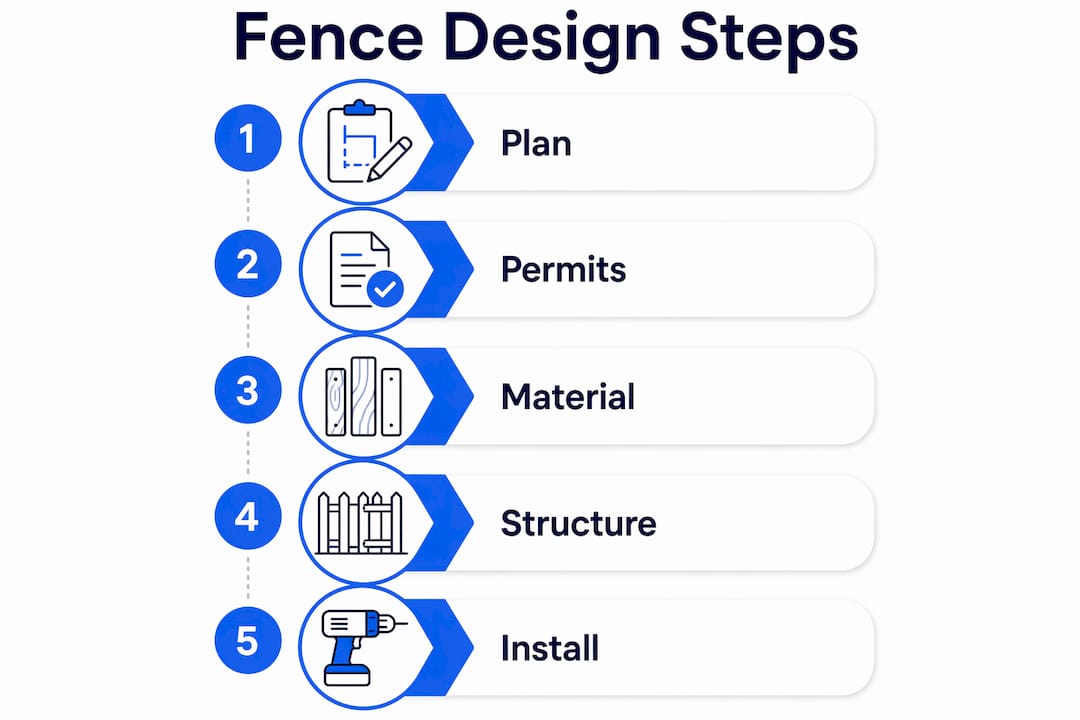
Follow this sequence from first decision through contractor-ready documents. Skipping steps, especially the legal checks in Steps 2 and 3, is the most common cause of costly rework.
-
Clarify your goals. Write down the primary function for each section of fence: privacy screening along the rear property line, security at the driveway gate, decorative framing at the front yard. Gate location, swing direction, and automation needs belong in this first conversation.
-
Run the legal checks before anything else. Verify property lines with a recorded survey or plat map. In unincorporated LA County, fences up to 6 feet generally do not require a building permit, but front-yard setback rules and Department of Regional Planning approvals still apply. Cities like Beverly Hills, Santa Monica, and Burbank have stricter local rules, so always contact your specific city planning department. Check HOA covenants for material, color, and height restrictions.
-
Measure the site accurately. Walk every fence run with a measuring tape and record panel lengths, total linear footage, height requirements, and any slope changes. Note which sections face direct sun, irrigation spray, or prevailing wind. This measurement worksheet becomes the foundation of your contractor spec.
-
Assign structural and infill roles. Metal posts and frames carry the structural load and prevent the sagging and leaning that plague all-wood posts over time. Once the structural material is chosen, select infill based on climate exposure: composite or vinyl for high-moisture zones, cedar or redwood for interior-facing panels where you want warmth.
-
Size posts, spacing, and footings. Standard line posts for residential fencing are typically spaced several feet apart, with spacing adjusted based on infill weight and panel height. Gate posts and corner posts carry greater loads and need larger-diameter footings. In Los Angeles, frost depth is not a significant concern, but soil conditions vary widely across the region; consult your city’s building department for local footing requirements. For detailed guidance on post installation in Los Angeles, local soil and setback specifics matter.
-
Design every transition and detail. Most fence failures concentrate at connection points where moisture sits or materials cannot move freely. Design rubber gaskets or plastic spacers between wood and metal surfaces, leave a minimum 1/2-inch gap at the bottom rail for drainage, and specify expansion gaps for composite boards per the manufacturer’s tolerance.
-
Specify fasteners and hardware. Use stainless steel or hot-dipped galvanized fasteners wherever wood meets metal. Where dissimilar metals must contact each other, use isolation washers or rubber grommets to prevent galvanic corrosion. Never use standard zinc-plated screws in a mixed-metal assembly outdoors.
-
Plan your finish and maintenance schedule. Seal or stain all wood end cuts before installation. Powder-coated aluminum needs only annual inspection for chips or scratches; touch up any bare metal immediately. Write a first-year inspection checklist covering fastener tightness, gate alignment, and drainage at bottom rails.
-
Build a realistic cost and timeline estimate. Line-item every cost category: linear footage of materials, labor for custom transitions, gate fabrication, permit fees, and hardware. Add a 15–25% contingency for grading surprises, drainage work, or HOA revision requests. Planning and permit approvals can take several weeks depending on your city and HOA.
-
Prepare the contractor spec package. Two pages of dimensioned drawings and written specifications prevent scope disputes and pricing gaps. Use tools like SketchUp or Planner 5D to preview material transitions visually before finalizing the drawings. Include a reference detail sketch for every transition type in the design.
Pro Tip: Get three contractor bids using the same spec document. When bids diverge significantly, the difference almost always traces back to assumptions about transition details or gate hardware — exactly the items your spec should nail down.
What structural rules keep a mixed-material fence standing?
The single most reliable structural decision you can make is letting metal carry the load. Steel or powder-coated aluminum posts and frames deliver long-term stiffness that wood simply cannot match over a decade of LA sun and occasional Santa Ana wind events. Wood and composite serve as the finish layer, not the skeleton.
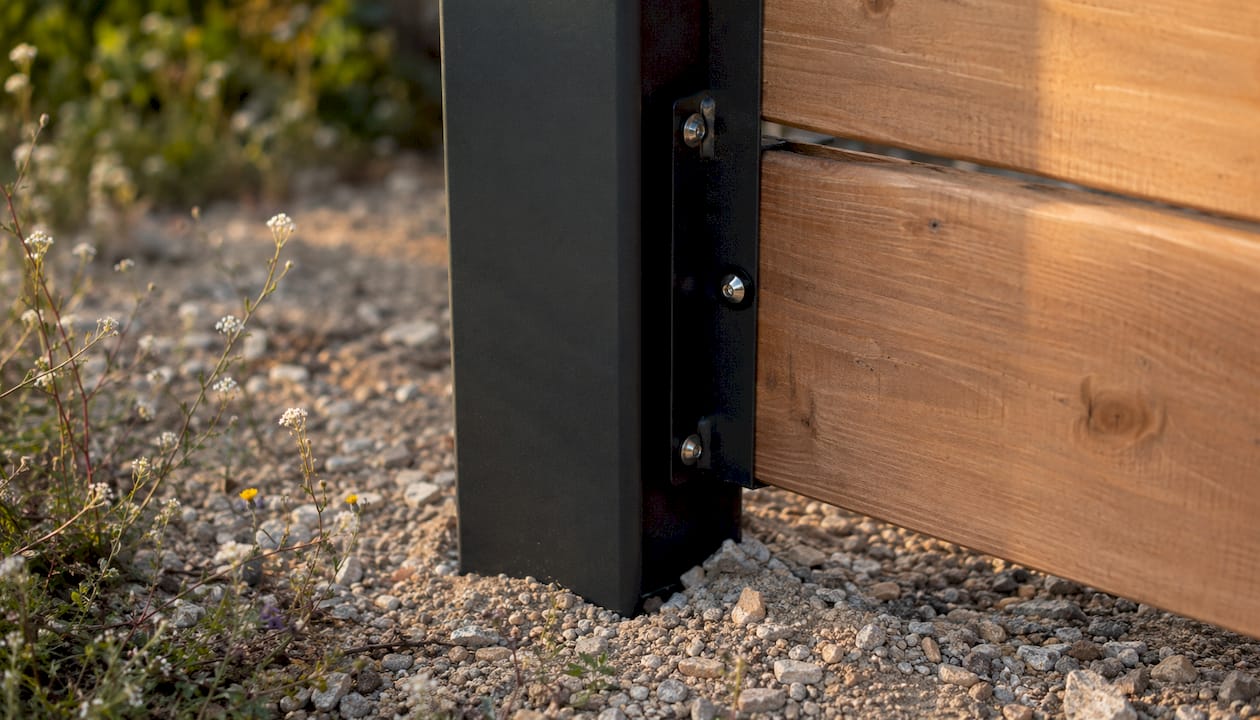
Post embedment depth should follow your city’s building department guidance. As a general rule, embed posts to at least one-third of their total length, with concrete footings that extend below the active soil layer. Corner posts, end posts, and gate posts always need larger-diameter footings than line posts because they carry concentrated lateral and vertical loads.
Gate engineering deserves special attention. Larger or automated gates almost always require metal framing and hardware rated for the gate’s actual weight and swing frequency. An undersized hinge on a wide cedar-clad gate will fail within two to three years. For automated driveway gates in Bel Air or Beverly Hills, the gate design process involves both structural engineering and an electrical permit for the automation system.
Fastener selection is where many DIY projects go wrong. Stainless steel or hot-dipped galvanized fasteners are the minimum standard when wood meets metal outdoors. Where aluminum frames meet steel hardware, use isolation washers to break the galvanic circuit. Standard zinc-plated screws corrode within one to two seasons in an outdoor mixed-metal assembly, staining the wood and weakening the connection.
How do you make material transitions look intentional?
The difference between a mixed-material fence that looks custom and one that looks patched together comes down to three design principles: consistent reveals, matching hardware finishes, and at least one repeated element that runs across all materials.
A consistent reveal means every board, panel, or stone course sits at the same depth relative to the frame. When some boards are flush and others are proud of the frame by varying amounts, the fence reads as unfinished. Metal U-channels that accept wood or composite boards are the cleanest solution: they set the reveal automatically and protect the board ends from moisture.
Pro Tip: Choose one hardware finish, such as matte black or brushed bronze, and apply it to every visible fastener, hinge, latch, and cap rail bracket across the entire fence. That single decision unifies materials that would otherwise look mismatched.
Joinery patterns to avoid include trapped board ends with no drainage path, un-isolated fasteners where dissimilar metals meet, and long unsupported horizontal spans that sag under their own weight. A horizontal composite board spanning more than 6 feet without a mid-span support will visibly deflect within one season.
Aesthetic cohesion also comes from repeating a cap rail or top band across the full fence length. A powder-coated aluminum cap rail that runs continuously over wood infill panels, masonry columns, and gate frames ties every element into a single composition. The eye reads the continuous line and registers the fence as designed, not assembled.
What do permits, HOA approvals, and costs actually look like in LA?
Cost and timeline vary more in Los Angeles than almost anywhere else in the country, because you may be dealing with unincorporated LA County rules, a city planning department, an HOA, and a utility clearance all at once.
| Cost Component | Typical Range | Notes |
|---|---|---|
| Materials (metal frame + wood infill) | Varies by linear footage | Metal frames add cost vs. all-wood; composite infill adds more |
| Labor for custom transitions | Higher than standard fencing | Transition details require skilled fabrication time |
| Gate fabrication and hardware | Significant premium for automated gates | Automated gates require separate electrical permit |
| Building permit fees | Varies by city | Many standard fences under 6 ft are exempt in unincorporated LA County |
| HOA submittal and review | Varies by association | Some HOAs charge review fees; allow 2–6 weeks for approval |
| Contingency | Add 15–25% to total budget | For grading, drainage, or HOA revision requests |
Permit and HOA checklist for Los Angeles homeowners:
- Obtain a recorded property survey or plat map confirming boundary lines.
- Check LA County Building and Safety for fence height exemptions in unincorporated areas (generally up to 6 feet).
- Contact your specific city planning department if you live in an incorporated city; Beverly Hills, Santa Monica, and Burbank each have their own front-yard height and setback rules.
- Confirm HOA covenants for material type, color, height, and placement before ordering anything.
- Apply for an electrical permit if the project includes gate automation.
- Place an 811 utility-marking call at least three business days before any excavation.
Note: Many guides state that all LA County fences under 6 feet are permit-free. That is only true for unincorporated areas. If you live within an incorporated city, your city’s rules govern, and they are often stricter. Confirm with your local planning office before breaking ground.
Timeline planning should account for 1–6 weeks for permits and HOA approvals, 1–4 weeks for fabrication and installation of a standard residential run, and additional cure time for concrete footings (typically 24–48 hours before loading). Terrain and grading conditions can extend both the schedule and the budget, particularly on sloped lots common in the Hollywood Hills and Bel Air.
How long will each material last, and what maintenance does it need?
Realistic lifespan expectations prevent the most common homeowner disappointment: choosing a material for its appearance without understanding its upkeep demands.
- Unprotected wood posts in ground contact: 5–10 years before rot becomes a structural problem, even with pressure treatment.
- Wood infill on metal frames (kept off grade): 15–25 years with proper staining every 2–3 years and sealed end cuts at installation.
- Composite infill on metal frames: 25–30 years with minimal maintenance; occasional washing and fastener checks are the primary tasks.
- Powder-coated aluminum or steel frames: 20–30+ years with annual inspection for chips or scratches and immediate touch-up of any bare metal.
Annual maintenance tasks by material:
- Wood: Inspect for checking (surface cracks), re-stain or re-seal every 2–3 years, check fastener tightness, and look for discoloration at board ends that signals moisture infiltration.
- Composite: Wash with mild soap and water, check expansion gaps for debris that could restrict movement, and inspect fastener heads for corrosion.
- Metal frames: Look for paint chips, rust spots at cut ends or drilled holes, and loose welds at gate corners.
- Gates: Lubricate hinges and latches twice a year; check alignment after any significant wind event or ground movement.
In high-UV zones across the San Fernando Valley and on coastal properties in Santa Monica, aluminum-core composite outperforms standard wood-plastic composite because the aluminum core prevents the warping that heat cycling causes in all-polymer boards. For poolside fencing, composite or powder-coated aluminum is the clear choice: chlorine splash and constant moisture make untreated wood a poor long-term investment.
First-year inspection checklist: check for post settlement (any visible lean or shift), fastener loosening at transition points, gate sag or latch misalignment, and drainage performance at bottom rails after the first heavy rain.
What are the most common problems and how do you fix them?
Most failures in mixed-material fences are predictable and preventable, but they are also fixable early if you know what to look for.
Red flags to catch early:
- Rust staining streaking down from fastener points onto wood or masonry surfaces
- Sagging panels, particularly at mid-span on long horizontal runs
- Standing water or dark staining at the base of posts or bottom rails
- Gate latches that no longer align without lifting the gate by hand
- Composite boards that have visibly bowed outward between fasteners
Short-term fixes that buy time:
- Add a drainage gap at the bottom rail by shimming boards up 1/2 inch if they are currently sitting on grade.
- Replace corroded fasteners with stainless steel alternatives and seal the surrounding wood with exterior wood preservative.
- Install temporary gate shims to restore latch alignment while you assess whether the hinge or the post is the root cause.
- Apply touch-up powder-coat paint to any bare metal spots to stop corrosion before it spreads.
When to call a professional: Post rot at or below grade means the footing has likely been compromised and requires excavation. Persistent galvanic corrosion after fastener replacement signals a systemic isolation failure that needs a full hardware audit. Wide gate re-engineering, particularly for automated gates in Brentwood or Encino, requires both a fabricator and an electrical contractor working from updated drawings.
Materials compatibility and fastening quick-reference chart
| Connection Type | Recommended Fastener | Isolation Required | Expansion Gap |
|---|---|---|---|
| Wood to steel frame | Stainless steel or hot-dipped galvanized screws | Rubber or neoprene washer between surfaces | Not required for wood |
| Composite to aluminum frame | Stainless steel screws per manufacturer spec | Plastic or nylon spacer at contact points | 1/4–3/8 inch per board end |
| Vinyl to metal frame | Stainless steel or aluminum screws | Plastic spacer recommended | 1/4 inch minimum per section |
| Stone/masonry to metal post | Stainless steel anchor bolts with epoxy | Non-metallic shim or grout bed | Not applicable |
| Aluminum frame to steel post | Stainless steel bolts | Isolation washer or nylon bushing required | Not required |
| Wood to aluminum frame | Stainless steel screws | Plastic or rubber washer | Not required for wood |
Compatibility flags:
- Good: Wood to steel with galvanized fasteners and rubber washers; composite to aluminum with stainless screws and designed gaps.
- Caution: Vinyl to steel in high-UV environments; vinyl can become brittle and crack at fastener points without UV-stabilized spacers.
- Requires isolation: Any aluminum-to-steel contact; galvanic corrosion will begin within one to two seasons without a non-conductive barrier.
Key Takeaways
A mixed-material fence built on a metal structural frame with properly detailed infill and isolation hardware will outlast an all-wood fence by a decade or more in Los Angeles conditions.
| Point | Details |
|---|---|
| Assign material roles first | Metal carries the structural load; wood, composite, or vinyl serves as replaceable infill. |
| Legal checks before materials | Survey property lines and confirm city or LA County permit rules before purchasing anything. |
| Design transitions for movement | Specify expansion gaps for composite boards and drainage gaps at bottom rails to prevent moisture failure. |
| Add 15–25% contingency | Budget overruns in mixed-material projects almost always trace to custom transitions or unexpected grading. |
| Fence-gate-estimator for LA budgets | Use Fence-gate-estimator’s instant cost calculator to get a realistic budget estimate before requesting contractor bids. |
What most homeowners get wrong about mixed-material fences
The conventional advice on mixed-material fencing focuses almost entirely on aesthetics: which combinations look good, which finishes are trending. That framing gets homeowners into trouble because it puts the visual decision before the structural one.
The professionals who build these fences in Los Angeles consistently make the same call: metal for structure, wood or composite for finish. The reason is not just stiffness. It is replaceability. A cedar board that weathers or gets damaged in five years costs almost nothing to swap out when it is clipped into a steel frame. The same board embedded in a wood post-and-rail system means pulling posts, re-digging footings, and rebuilding sections. The hybrid approach is not just stronger; it is smarter long-term economics.
What also gets underestimated is the permit and HOA timeline. Homeowners in Brentwood, Pasadena, and West Hollywood routinely underestimate how long HOA review takes, and they order materials before approval comes through. When the HOA requests a finish change or a height reduction, those materials become a sunk cost. The legal checks in Step 2 of the design process are not bureaucratic formality; they are the single most important risk-management step in the entire project.
Finally, transition details are where the design either holds or fails. A fence that looks beautiful on day one but traps moisture at every board-to-frame connection will show rust staining and rot within three years. The isolation hardware, drainage gaps, and expansion allowances described in this guide are not optional refinements. They are the difference between a fence that lasts 25 years and one that needs major repairs in five.
Get an instant cost estimate for your Los Angeles fence project
Designing a mixed-material fence with the right structural details and material combinations is the hard part. Getting a realistic budget should not be. Fence-gate-estimator’s custom fencing cost calculator gives Los Angeles homeowners an immediate, transparent estimate based on your property’s linear footage, material choices, and gate specifications, using current local labor and material rates.
Once you have a ballpark figure from the estimator, use the measurement worksheet and spec checklist from this guide to prepare your contractor briefing. If your project includes an automated gate, the gate automation service page covers hardware options and permitting requirements specific to LA. For a full onsite assessment and custom quote, contact Fence-gate-estimator directly to schedule a consultation with a local installation specialist.
Useful sources and further reading
- Los Angeles County Building and Safety — Fence Permit FAQ: Official guidance on when a building permit is required for fences in unincorporated LA County.
- LA County Work Exemptions (fences): Specific exemption thresholds for fence height and material in unincorporated areas.
- National Fencing Authority — Fence Installation Process: Comprehensive phase-by-phase installation framework covering permits, utility marking, post setting, and inspection.
- Planning your fence project: Practical guidance on early planning steps including property line verification and HOA checks.
- Mixed-material fences: combining wood, metal and composite: Detailed professional guidance on structural roles, fastener selection, and transition details.
- Modern mixed-material fencing trends and hybrid design ideas: Material performance data including composite thermal expansion and UV resistance in hot climates.
- HOA guidance: Contact your HOA directly for submittal requirements; the Community Associations Institute (CAI) at caionline.org provides resources for understanding CC&R restrictions.
- Professional installer credentials: Look for contractors licensed by the California Contractors State License Board (CSLB) with a C-13 (fencing) or C-61/D-16 classification.
- Fence-gate-estimator — Custom Fencing Services: Instant cost estimation and custom installation services for Los Angeles homeowners.
FAQ
Do I need a permit for a mixed-material fence in Los Angeles?
In unincorporated LA County, fences up to 6 feet generally do not require a building permit, but front-yard setback approvals from the Department of Regional Planning may still apply. If you live within an incorporated city such as Beverly Hills, Santa Monica, or Burbank, check with that city’s planning department directly, as local rules are often stricter.
What is the best structural material for a mixed-material fence?
Steel or powder-coated aluminum posts and frames are the professional standard because they resist sagging and leaning over time, providing a rigid skeleton that wood or composite infill cannot replicate on its own.
How do I prevent corrosion where different metals meet?
Use isolation washers, rubber grommets, or nylon bushings at every point where dissimilar metals contact each other, and specify stainless steel or hot-dipped galvanized fasteners throughout the assembly.
How much contingency should I add to a mixed-material fence budget?
Add 15–25% above your base estimate to cover custom transition fabrication, unexpected grading or drainage work, and potential HOA revision requests.
How long does a mixed-material fence last in Los Angeles?
Wood infill on metal frames, properly stained and kept off grade, typically lasts 15–25 years. Composite infill on metal frames can reach 25–30 years with minimal maintenance, making it the better choice for high-UV or coastal exposures common across Southern California.
Recommended
- Custom fence components: build luxury, security, and style in LA | LA Electric Gate Service
- Expert aluminum fence installation guide for upscale LA homes | LA Electric Gate Service
- Modern Gate Design Process: A Los Angeles Homeowner’s Guide | LA Electric Gate Service
- Security Fence Features List for LA Homeowners | LA Electric Gate Service