Expert aluminum fence installation guide for upscale LA homes
By BabyLoveGrowth
Aluminum fencing has become the go-to choice for homeowners across Beverly Hills, Bel Air, and Santa Monica who want a perimeter that signals elegance without sacrificing real security. It delivers the refined look of wrought iron at a fraction of the weight, resists California’s coastal humidity, and requires almost no upkeep year after year. Whether you’re replacing an aging wood fence or starting fresh on a new build, getting the installation right the first time is everything. This guide walks you through every stage, from permit research and material selection to post setting, panel attachment, and long-term maintenance.
Table of Contents
- Why choose aluminum fencing for your Los Angeles home?
- Planning your project: requirements, permits, and materials
- Step-by-step aluminum fence installation process
- Finishing touches: inspection, maintenance, and troubleshooting
- Our take: what most aluminum fence guides miss for LA homes
- Get expert help for your luxury aluminum fence project
- Frequently asked questions
Key Takeaways
| Point Details | |
| Plan for compliance | Review permits and neighborhood guidelines before any project work begins. |
| Invest in quality materials | Choose premium aluminum products for durability, security, and style. |
| Follow a proven process | Careful planning, expert installation, and regular checks ensure lasting results. |
| Maintenance prolongs lifespan | A simple cleaning schedule and periodic inspections reduce issues and costs. |
Why choose aluminum fencing for your Los Angeles home?
Los Angeles luxury properties demand fencing that performs on multiple levels simultaneously. Your fence must deter intruders, satisfy HOA design standards, hold up against salt air and UV exposure, and still look polished from the street. Aluminum checks every one of those boxes, and it does so consistently over decades.
Security advantages over wood and vinyl
Wood fencing warps, splits, and softens over time, creating gaps and weak points that compromise your perimeter. Vinyl can flex under pressure and crack in extreme heat. Aluminum, by contrast, maintains its structural rigidity season after season. Commercial-grade aluminum panels typically feature welded rail-and-picket construction, meaning the joints don’t loosen the way screwed assemblies do. You can also specify taller panel heights, spear-top pickets, and anti-climb spacing to create a perimeter that genuinely deters unauthorized entry.
Pairing your fence with custom fencing options such as decorative finials and reinforced posts adds both visual authority and physical strength. If you’ve looked at vinyl fencing alternatives and found them lacking in rigidity, aluminum is consistently the upgrade that satisfies.
Weather resistance in the LA climate
Los Angeles presents a surprisingly demanding environment for fencing materials. Coastal neighborhoods face salt-laden air that accelerates corrosion in ferrous metals. Inland areas like the San Fernando Valley experience intense summer heat. Aluminum is naturally non-ferrous, meaning it won’t rust. Most premium panels also receive a powder-coat finish baked on at high temperatures, creating a surface that resists fading, chipping, and UV degradation for 20 or more years.
Customizability for upscale neighborhoods
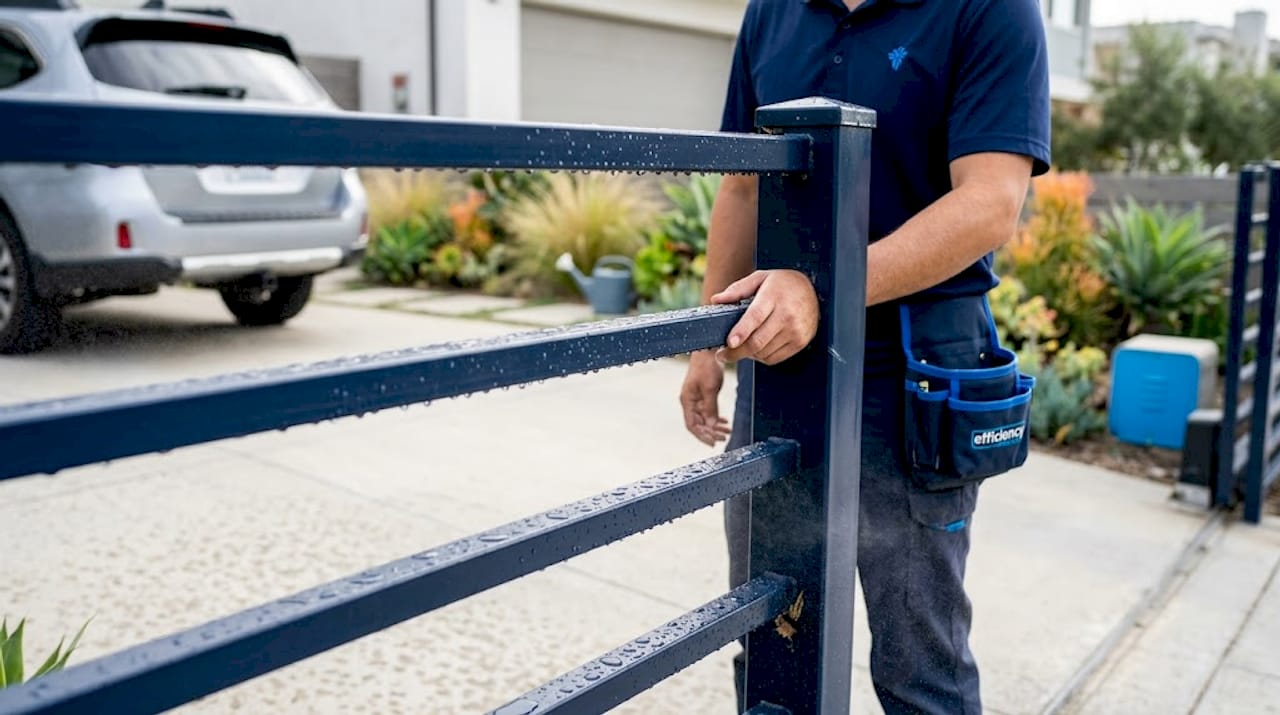
One of aluminum’s strongest selling points is the breadth of design options available. You can choose from dozens of panel styles, from simple flat-top pickets to ornate French Gothic profiles. Color options extend well beyond basic black, with bronze, white, and custom powder-coat colors available through specialty fabricators. Explore the full range of luxury fence components to understand how decorative post caps, finials, and rail profiles can be combined to match your home’s architectural language precisely.
Pro Tip: Request physical color samples from your fabricator before finalizing your order. Monitor colors vary significantly from how powder-coat finishes actually appear in direct California sunlight.
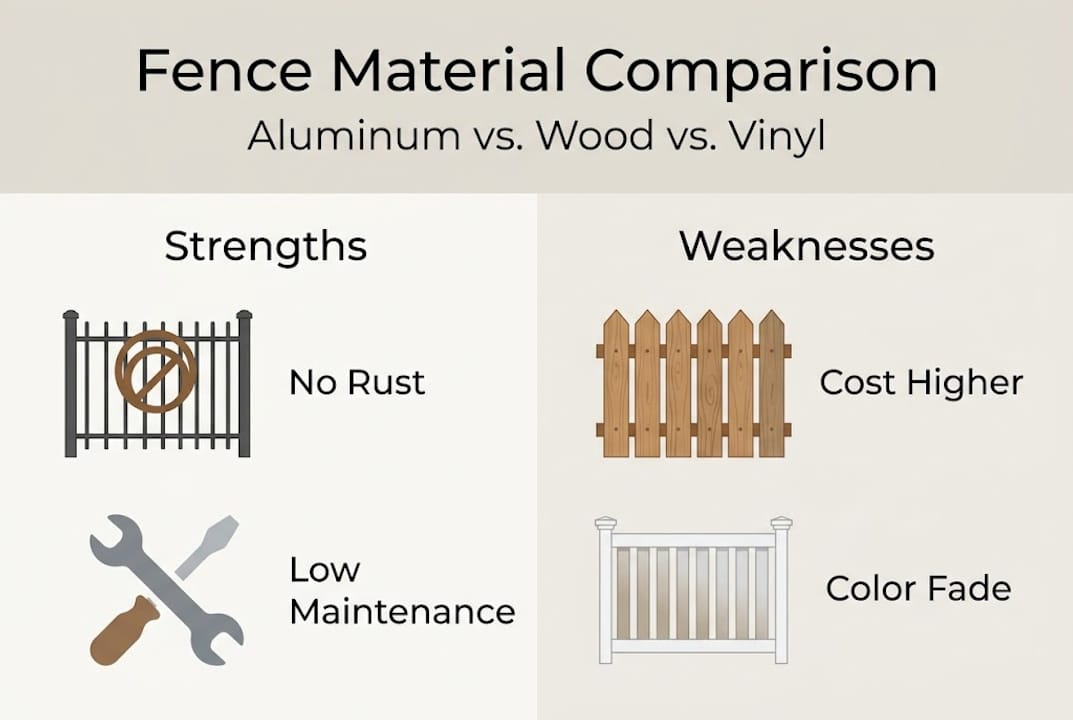
Quick comparison: aluminum vs. common alternatives
| Feature Aluminum Wood Vinyl | |||
| Rust/rot resistance | Excellent | Poor | Good |
| Maintenance required | Minimal | High | Moderate |
| Customization range | Very high | High | Moderate |
| Typical lifespan | 30+ years | 10-15 years | 20-25 years |
| Security rating | High | Moderate | Low-moderate |
Planning your project: requirements, permits, and materials
Once you understand the benefits, proper planning ensures a smooth and compliant installation. Skipping this stage is the single most common reason projects stall mid-construction or face costly rework.
HOA and city permit requirements
In Los Angeles, most new perimeter fencing installations require a permit from the Department of Building and Safety. Permit requirements vary by fence height, location relative to property lines, and whether the fence is in a front yard, side yard, or rear yard. Front-yard fences above 42 inches typically require a permit, while rear-yard fences up to 8 feet may qualify for an exemption depending on your zoning district.
Beyond city permits, many upscale communities in Bel Air, Hancock Park, and Pacific Palisades have active HOAs with their own design review processes. These boards often specify approved materials, colors, maximum heights, and gate styles. Submit your plans to the HOA design review committee before applying for your city permit to avoid conflicting approval conditions.
Property assessment before breaking ground
Accurate property line verification is non-negotiable. Hire a licensed surveyor if your boundary markers are unclear. Utility locating services (call 811 before you dig) will flag underground gas, water, and electrical lines that could create dangerous conflicts with post excavation. Understanding terrain impact on costs is equally important, since sloped lots require racked or stepped panel configurations that add material and labor complexity.
Materials and tools checklist
For a standard residential aluminum fence installation, you will need:
- Aluminum fence panels (pre-assembled or flat-pack, sized to your layout)
- Aluminum line posts and terminal posts (end, corner, and gate posts)
- Concrete mix (fast-setting, 80 lb bags per post)
- Gravel (for drainage at the base of each post hole)
- Self-tapping stainless steel screws (for panel-to-post attachment)
- Post caps (decorative and functional)
- Gate hardware (hinges, latches, and drop rods for double gates)
- String line and stakes (for layout alignment)
- Post-hole digger or power auger
- Level, tape measure, and chalk line
- Safety glasses, gloves, and hearing protection
If your project includes a vehicle entry point, review your driveway gate options early in the planning phase. Gate posts require deeper footings and larger post dimensions than standard line posts, so these specifications must be factored into your material order from the start.
Pro Tip: Order 5-10% more linear footage of fencing than your measured perimeter. Cutting errors, damaged panels during shipping, and layout adjustments are common, and re-ordering causes significant project delays.
Planning data at a glance
| Item Typical specification | |
| Post hole depth | 1/3 of post height + 6 in. |
| Concrete per post | 1-2 bags (80 lb) |
| Post spacing | 6-8 ft on center |
| Permit processing time (LA) | 2-6 weeks |
| HOA review timeline | 2-4 weeks |
Step-by-step aluminum fence installation process
With requirements in place, it’s time to move step-by-step through the installation. Following this sequence prevents the most common errors that lead to misaligned panels and unstable posts.
- Mark your layout. Drive stakes at all corner and end points. Run a string line between stakes at the finished fence height to establish your reference plane. Use a tape measure to mark post locations at consistent intervals, typically 6 to 8 feet on center depending on your panel width.
- Locate and mark post holes. Mark each hole center with spray paint or a stake. Double-check spacing against your panel dimensions before digging. A 6-foot panel requires posts set no more than 6 feet apart, measured from center to center.
- Excavate post holes. Use a power auger for efficiency on longer runs. In Los Angeles, standard line posts for a 4-foot fence should be set in holes at least 24 inches deep. Gate posts and corner posts need holes at least 36 inches deep to handle the additional lateral load. Understanding fence post installation essentials will help you size footings correctly for your specific soil conditions.
- Set posts in concrete. Add 4-6 inches of gravel to each hole for drainage. Set the post, check plumb on two perpendicular sides, and brace it temporarily. Pour fast-setting concrete around the post, following package directions for water ratio. Allow a minimum of 24 hours of cure time before attaching panels.
- Attach panels. Starting from a fixed end point, slide each panel into the routed channels on adjacent posts or secure them with the manufacturer’s bracket system. Use stainless steel self-tapping screws to lock panels firmly. Check alignment with your string line after every two panels.
- Install gates. Hang gate frames on heavy-duty hinges rated for the gate’s weight. Aluminum swing gates require at least two hinges for standard widths and three hinges for gates wider than 4 feet. Adjust hinge tension so the gate swings freely and closes squarely against the latch post.
- Install post caps and hardware. Snap or screw decorative post caps onto each post. Confirm all fasteners are tight and no panel edges are sharp or exposed.
Important: On sloped lots, decide between a racked configuration (panels follow the slope continuously) and a stepped configuration (panels drop in increments) before ordering materials. Racked panels require flexible brackets; stepped panels need precise measurement of each drop increment. Changing your approach mid-installation is costly. Review cost factors for fencing to understand how slope adds to your overall budget.
Pro Tip: Rent a laser level rather than relying solely on a string line. Laser levels maintain accuracy over long runs where string lines can sag and introduce cumulative alignment errors.
Finishing touches: inspection, maintenance, and troubleshooting
Installation complete, now let’s ensure your fence stays flawless year after year. A thorough post-installation review catches small problems before they become expensive repairs.
Post-installation inspection checklist
Walk the entire perimeter and verify the following:
- Alignment: Every panel should be level horizontally and plumb vertically. Sight down the fence line from each corner to catch any bowing.
- Gate function: Open and close each gate fully. It should swing or slide without binding, and the latch should engage cleanly without lifting or forcing.
- Fastener security: Check every screw and bolt by hand. Any that spin freely or feel loose should be replaced immediately with the next size up.
- Post stability: Push each post firmly from multiple directions. There should be no rocking or movement. Any post that shifts indicates insufficient concrete or inadequate hole depth.
- Finish integrity: Inspect the powder-coat surface for chips or scratches caused during installation. Touch up with manufacturer-supplied paint to prevent oxidation at exposed aluminum edges.
Seasonal cleaning and maintenance
Aluminum fencing requires very little ongoing care, but a consistent routine keeps it looking sharp and extends its functional life. Wash panels twice a year using a mild dish soap solution and a soft-bristle brush. Rinse thoroughly with a garden hose. Avoid pressure washing at high settings, which can force water behind post caps and into bracket channels.
Inspect gate hinges and latch mechanisms annually. Apply a silicone-based lubricant to moving parts. Avoid petroleum-based lubricants, which attract dust and grime. Check that post caps remain fully seated, since loose caps allow water to pool inside hollow posts and accelerate corrosion at the base.
Aluminum fencing consistently ranks among the lowest-maintenance perimeter options available, with luxury fence components designed for decades of reliable performance when properly maintained.
Common troubleshooting scenarios
Alignment drift: If a panel shifts out of plane after several months, check whether the adjacent post has moved. Loose concrete, expansive clay soil, or root intrusion can shift posts. Re-plumb and re-pour the footing if necessary.
Corrosion at fastener points: Even stainless steel screws can cause galvanic corrosion where they contact aluminum in coastal environments. Replace any discolored fasteners with marine-grade stainless or nylon-coated alternatives.
Gate sag: A gate that no longer closes squarely has usually developed a hinge issue or a post lean. Tighten hinge bolts first. If the post has shifted, re-setting the footing resolves the problem permanently.
Pro Tip: Photograph your completed installation from multiple angles and store the images with your permit paperwork. If a neighbor or HOA questions your fence placement years later, dated photos provide clear documentation of the original installation.
Our take: what most aluminum fence guides miss for LA homes
Most installation guides treat aluminum fencing as a universal product, but in Los Angeles, context matters enormously. A fence that looks appropriate in a suburban Torrance neighborhood can feel completely out of scale on a hillside estate in Bel Air or a gated compound in Holmby Hills. Panel height, picket spacing, post cap profile, and color all communicate something specific about a property’s character, and getting those details wrong is a visible, permanent mistake.
We also see homeowners underestimate the relationship between elevation changes and gate performance. A gate that operates perfectly on flat ground can bind, drag, or fail to latch properly when the driveway slopes even a few degrees. This is where working with experienced local professionals pays off. They understand how to specify self-closing hinges with adjustable tension, how to position latch strikes to compensate for minor grade changes, and how to recommend custom fencing solutions that align with both your HOA’s expectations and your personal vision.
Elegance and durability are not competing priorities in aluminum fencing. They are the same priority, expressed through precise fabrication and thoughtful installation.
Get expert help for your luxury aluminum fence project
You’ve done the research. Now it’s time to move from planning to reality with a team that understands Los Angeles luxury properties from the inside out.
At fence-gate-estimator.com, you can get an instant, detailed cost estimate for your aluminum fence project in minutes. Input your property dimensions, preferred panel style, and any gate automation features you want, and our estimator generates a realistic, itemized budget using current LA material and labor rates. Whether you’re planning a simple perimeter fence or a fully automated entry with custom driveway gates, we connect you with professionals who specialize in high-end residential installations. No guesswork. No surprises. Just a clear path to a fence that genuinely elevates your property.
Frequently asked questions
How long does it take to install an aluminum fence on an average Los Angeles property?
Most residential aluminum fence installations in LA take 2 to 4 days, depending on yard size, terrain complexity, and whether automated gates are included.
Do I need a permit to install an aluminum fence in Los Angeles?
Yes, city regulations typically require permits for new perimeter fencing in Los Angeles, particularly for front-yard installations and fences exceeding standard height limits.
What maintenance does an aluminum fence require?
Aluminum fencing needs minimal maintenance: a twice-yearly wash with mild soap, annual inspection of fasteners and hinges, and occasional touch-up of any powder-coat chips to prevent surface oxidation.
Will aluminum fencing increase my property value in upscale LA neighborhoods?
A professionally installed aluminum fence enhances curb appeal, strengthens security, and signals quality to prospective buyers, all of which contribute positively to market value in luxury Los Angeles neighborhoods.
Recommended
- Custom fence components: build luxury, security, and style in LA | LA Electric Gate Service
- Fence post installation in Los Angeles: 5 key essentials | LA Electric Gate Service
- Expert Gate & Fence Blog | LA Electric Gate Service
- How terrain impacts fence costs in Los Angeles: smart choices | LA Electric Gate Service