How to Add Privacy Slats to a Chain-Link Fence
By BabyLoveGrowth AI
Adding privacy slats to an existing chain-link fence is a straightforward DIY project most homeowners can complete in a single afternoon. The basic method is simple: slats slide vertically through the mesh diamonds or weave diagonally across them, locking into place with minimal tools. A typical 10-linear-foot section takes a moderate amount of time to install slats once you have materials staged. Before you start, check two things: whether your posts are firmly set in concrete and whether your property sits on an exposed, windy lot. Loose posts or a hilltop site in the Santa Monica Mountains, for example, means slats will increase wind load significantly, and that changes the project from a weekend DIY to a professional reinforcement job.
Quick check before buying slats: Grab the top rail of your fence and push sideways. If the posts rock or the mesh sags more than an inch, repair the structure before adding slats. A slated fence catches wind like a solid wall, and weak posts will not survive the first Santa Ana wind event.
Table of Contents
- What tools and materials do you need before starting?
- How do you choose the right slat style and privacy rating?
- Step-by-step installation: measure, prep, insert, secure, and trim
- How do you prep the fence and fix common problems?
- Wind resistance, structural limits, and safety checks
- How long does installation take and what does it cost?
- How do you maintain slats and remove them later?
- When should you hire a professional instead of DIY?
- Key Takeaways
- The case for knowing your limits before you start
- Get an instant cost estimate for your LA fence project
- Sources and further reading
- FAQ
What tools and materials do you need before starting?
Gathering everything before you walk out to the fence saves multiple trips and keeps the job moving. Here is a complete checklist.
Slat materials:
- PVC or polyethylene vertical-insert slats (the most common type; available in 6-ft and 8-ft lengths)
- Aluminum slats for higher durability in coastal areas like Santa Monica or Malibu
- Hedge-style or privacy mesh rolls for a softer visual look
- Bottom-lock channel (optional but recommended for a clean lower edge)
- Locking caps or top-rail clips to secure slat tops
- Zip ties, hog rings, or metal clips for fastening loose ends
- Order 10% more slats than your linear footage calculation to account for cuts at gates and corners
Tools:
- Tape measure
- Utility knife or heavy-duty shears (for trimming PVC slats to height)
- Tin snips (for trimming aluminum slats)
- Rubber mallet (for seating bottom-lock channels)
- Work gloves and safety glasses
- Level or string line (to check alignment across a long fence run)
- Hog ring pliers (if using hog rings instead of zip ties)
Buying notes: Match slat width and profile to your mesh’s diamond size and wire gauge before ordering. Standard residential chain link uses a 2-inch diamond; tennis-court mesh runs 1-3/4 inches and requires narrower slats. The packaging label should state mesh compatibility. A wrong match makes installation harder and causes slats to pop out over time. Per the DIY installation guide from Guided Review, staging all materials along the fence line before you begin is one of the most effective ways to keep the job efficient.
How do you choose the right slat style and privacy rating?
Not every slat works on every fence, and the style you pick affects both privacy and structural load. ASTM F3000 formalizes the main polymer slat types, and understanding those labels helps you order the right product.
| Slat Type | ASTM Label | Privacy Rating | Best For |
|---|---|---|---|
| Vertical insert (flat) | P-V | 75%–85% | Sheltered yards, standard residential lots |
| Diagonal weave | P-D | 85%–95% | Moderate wind exposure, visual texture |
| Bottom-lock / tubular | F-VDH | 75%–85% | Clean finish, HOA-sensitive properties |
| Winged / self-locking | PI-V | 85%–95% | Fast DIY install, good airflow balance |
| Hedge / privacy mesh | N/A | 85%–95% | Soft natural look, Brentwood or Bel Air aesthetics |
| Pre-inserted privacy fabric | N/A | 95%–100% | Maximum privacy, low-wind enclosed yards |
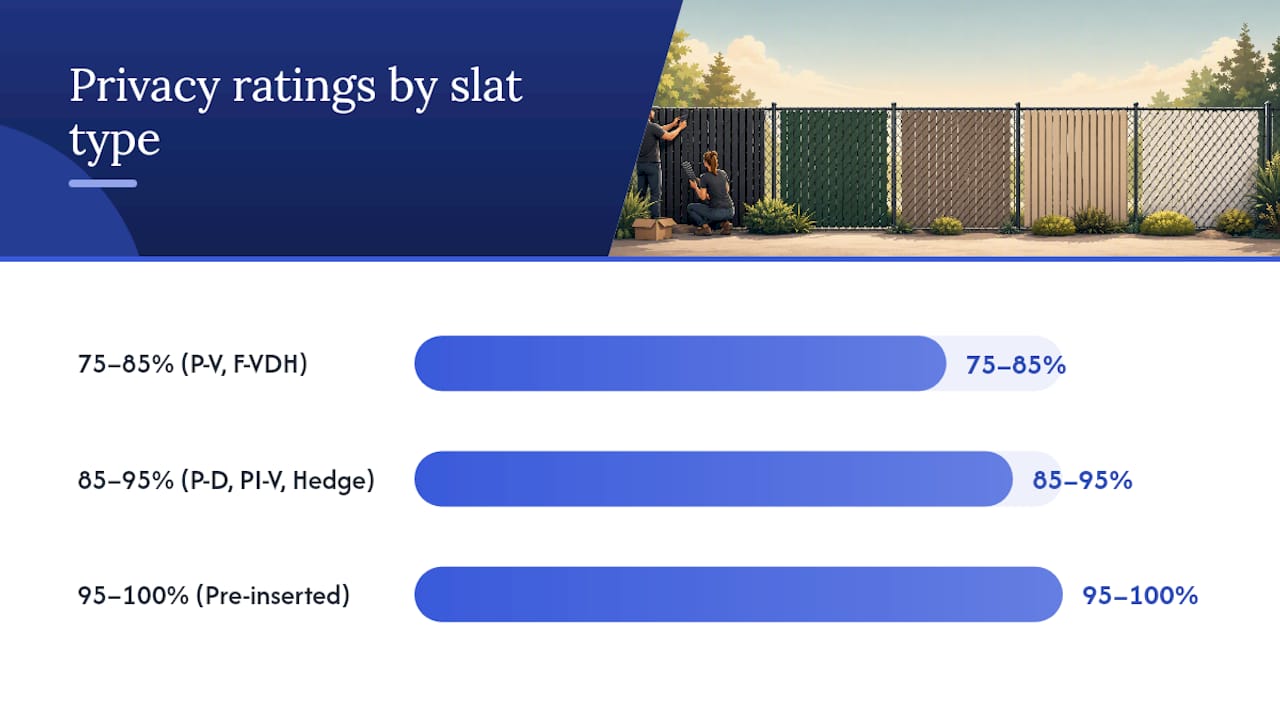
Privacy rating vs. wind load is the most important trade-off. A 75% privacy slat still allows meaningful airflow through the fence, reducing pressure on posts. A 95%–100% rating turns the fence into a near-solid surface. Guidance from Fencescape notes that higher privacy ratings increase structural stress on posts, which is why exposed properties in Studio City, Sherman Oaks, or hillside Encino lots should stay at 85% or below unless posts are reinforced.
Sizing compatibility is the second critical factor. Standard 2-inch diamond mesh accepts most slats designed for residential chain link. A 2-1/4-inch diamond, common on older commercial fencing, needs a wider slat profile. Narrow tennis-court mesh (1-3/4 inch) requires a purpose-built narrow slat. Always confirm the mesh size before ordering.
Pro Tip: Winged or self-locking slats (PI-V) are the fastest to install because they grip the wire without additional fasteners. Choose bottom-lock tubular slats when you want the cleanest finished edge at the bottom rail, particularly for front-facing fences in Beverly Hills or Pasadena where curb appeal matters.
Step-by-step installation: measure, prep, insert, secure, and trim
Follow these steps in order. Skipping the prep steps is the most common reason slats look uneven or pop out within a season.
-
Measure your fence. Record the total linear footage and the fence height. Divide linear footage by the slat spacing listed on the packaging to calculate the number of slats needed. Add 10% for waste. Most boxes cover approximately 10 linear feet, with 78–100 slats per box depending on style, per installation notes from Chain Link Fencing.
-
Prepare the mesh. Remove any debris, loose wire ties, or old fasteners. Tighten sagging mesh by re-tensioning the tension wire or adding a new bottom tension wire. Straighten bent bottom diamonds with pliers before inserting slats.
-
Install the bottom-lock channel (if using). Slide the channel along the bottom tension wire before inserting any slats. The Pexco bottom-lock installation guide recommends seating the channel with a rubber mallet and confirming it is level before proceeding. An incorrectly oriented channel is the most common installation error with this system.
-
Insert slats. For vertical-insert slats, start at one end post and work toward the other. Hold the slat at a slight angle, thread the tip through the top diamond, then work it downward through each successive diamond with a gentle rocking motion. Do not force it. For diagonal weave slats, weave the slat over one wire and under the next in a continuous diagonal path. Watch the
before starting if you are new to the weave technique. -
Secure the slats. Fold or clip the top of each slat over the top rail using the manufacturer’s locking cap or a zip tie. At the bottom, seat the slat tip into the bottom-lock channel or secure it with a hog ring. Space zip ties or hog rings every 12–18 inches on long runs.
-
Trim at gates and corners. Measure the gap at each gate post and corner, then cut slats to length with a utility knife (PVC) or tin snips (aluminum). Leave 1/4-inch clearance at gate openings so slats do not bind the gate swing. File or tape any sharp aluminum edges.
-
Final alignment check. Step back and sight down the fence line. Use a string line to confirm the top edges are consistent. Adjust any slats that are riding high or sitting crooked before the locking caps are fully seated.
Time estimate: A single person can typically slat about 10 linear feet in about 20–30 minutes once materials are staged. A two-person team cuts that to 12–15 minutes per 10 feet, with one person feeding slats and the other securing them.
How do you prep the fence and fix common problems?
The condition of your existing chain-link fence determines whether this is a clean one-day project or a two-stage repair-then-slat job.
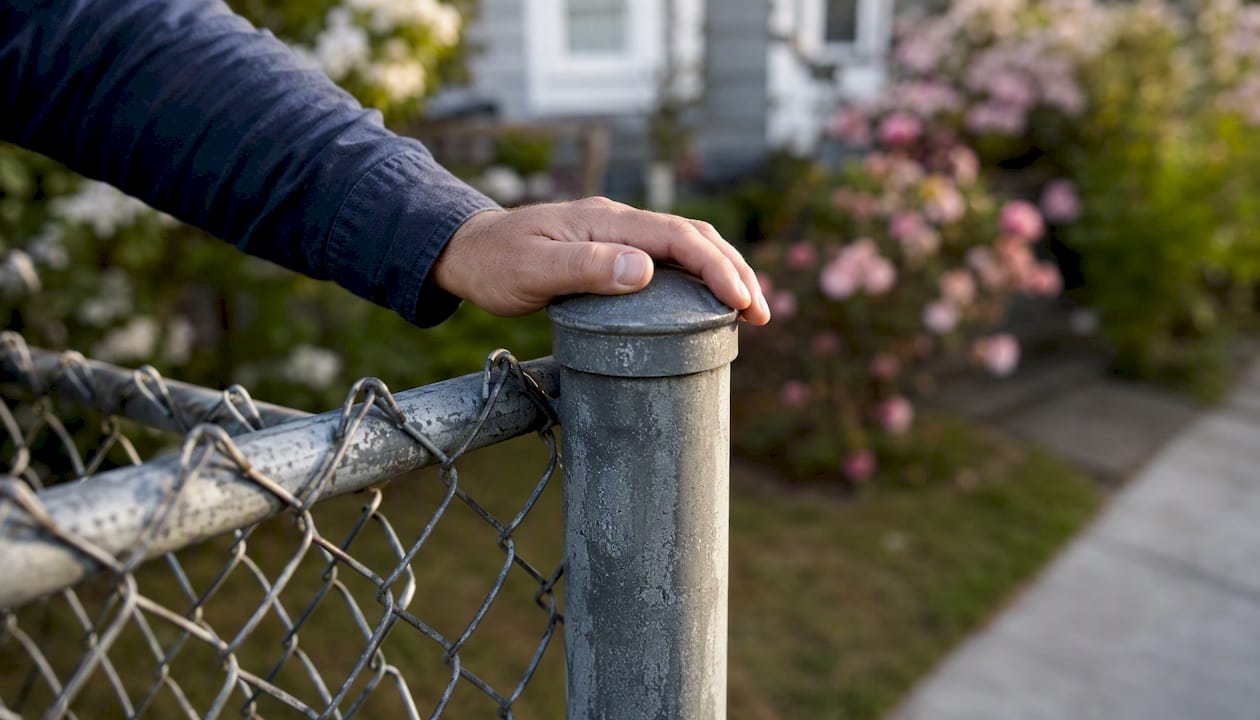
Inspect posts and mesh first. Push each post at the top. A post that rocks more than half an inch has a compromised footing and needs re-setting before you add slats. Sagging mesh that droops more than 2 inches between posts needs re-tensioning. Rust on the wire is cosmetic unless the wire is actually breaking; surface rust alone does not prevent slatting.
Bent bottom diamonds are common on older fences and create gaps at the base where slats will not seat properly. Reshape bent diamonds with pliers, working from the inside of the fence. If the bottom 6 inches of mesh is badly deformed, a bottom-lock channel will cover the irregularity and give slats a clean seat regardless of mesh condition.
Uneven ground is the trickier problem. Where the fence follows a slope, slats will be too long on the uphill side and too short on the downhill side if you cut them all to the same height. The solution is to cut slats individually to match the ground contour, or to use a bottom-lock channel that accommodates variable slat lengths. For terrain-driven installation complexity in Los Angeles, this is often the single factor that pushes a project from DIY to professional territory.
Double-sided slatting: Installing slats on both sides of the mesh doubles privacy but also doubles wind load. On an exposed property, that is a structural risk. If you want double-sided coverage, use a lower privacy-rated slat (75%–85%) on each side and confirm your posts are set at least 24 inches deep in concrete before proceeding.
Pro Tip: At gate openings, mark the slat length with a felt-tip pen before cutting, then test-fit one slat before cutting the full batch. Gate frames are rarely perfectly square, and a single test cut saves wasted material.
Wind resistance, structural limits, and safety checks
Slats change a chain-link fence from a porous wind filter into something much closer to a solid barrier. That shift in aerodynamics places real stress on posts, rails, and footings.
From Chain Link Info’s Wind Load Guidance: Adding privacy slats raises wind pressures on posts and rails in rough proportion to the fence’s effective solidity. Mitigation options include increasing post diameter, deepening footings, or choosing lower-solidity slat styles that allow more airflow.
What to inspect before slatting an exposed fence:
- Post diameter: residential chain link typically uses 1-5/8-inch or 2-inch line posts. For high-privacy slats on a fence over 5 feet tall, 2-3/8-inch posts are more appropriate.
- Post depth: standard residential installation sets posts 24–30 inches deep in concrete. Shallow footings (under 18 inches) are a failure risk with high-solidity slats.
- Post spacing: posts set more than 10 feet apart on a slated fence face higher bending loads. Intermediate posts may be needed.
- Fence line continuity: a fence that turns a corner or steps down a slope concentrates stress at the transition points.
Repair checklist for weak posts: Re-set loose posts by excavating around the base, pouring fresh concrete, and bracing the post plumb until the concrete cures (typically 24–48 hours). For a fence that needs new posts entirely, see the fence post installation guide for Los Angeles for local soil and permit considerations.
Safety warning for LA-area properties: Hilltop neighborhoods in Bel Air, the Hollywood Hills, and coastal sites in Santa Monica face sustained winds that can exceed 35 mph during Santa Ana events. Installing 95%–100% privacy slats on an unreinforced fence in those locations is a structural risk. A site-specific assessment from a licensed contractor is the right call before committing to high-solidity slats on any exposed property.
How long does installation take and what does it cost?
Time and cost both depend heavily on slat type, fence condition, and whether you are doing the work yourself or hiring a crew.
Time estimates:
| Scenario | Time per 10 Linear Feet |
|---|---|
| Vertical-insert slats, one person | 20–30 minutes |
| Vertical-insert slats, two people | 12–15 minutes |
| Diagonal weave, one person | around 30 minutes |
| Bottom-lock system, one person | 35–50 minutes (includes channel install) |
| Aluminum slats with trimming | Add 10–15 minutes per gate or corner |
Material cost ranges:
- PVC/HDPE slats: roughly $25–$50 per box (covering approximately 10 linear feet), depending on height and style. For a 100-linear-foot fence, budget $250–$500 in materials.
- Aluminum slats: typically $40–$80 per box for the same coverage, with higher durability in coastal or high-UV environments like Culver City or Malibu.
- Hedge-style privacy inserts: $30–$60 per 10-foot section; popular in Brentwood and Bel Air for a softer visual.
- Bottom-lock channels: add $1.50–$3.00 per linear foot to the material cost.
These are approximate ranges based on typical retail pricing; actual costs vary by supplier and current material prices. For a precise, up-to-date estimate tailored to your Los Angeles property, use the Fence-gate-estimator cost calculator.
When labor dominates the budget:
- Post reinforcement or replacement adds significant cost and typically requires professional labor.
- Hiring a crew for alignment on a long, uneven fence run (common in hillside Glendale or Pasadena properties) adds labor hours that can exceed the material cost.
- Permit requirements for new post installation in some LA jurisdictions add both time and fees.
Pro shopping tip: Buy from a local fencing supplier rather than a big-box store when possible. Local suppliers in the LA area often stock the specific mesh-compatible slat profiles that big-box stores do not carry, and staff can confirm compatibility on the spot.
How do you maintain slats and remove them later?
Privacy slats are low-maintenance, but a brief annual inspection keeps them looking sharp and extends their service life.
Routine maintenance:
- Rinse slats with a garden hose once or twice a year to clear dust, smog residue, and organic debris. Los Angeles air quality means surface grime accumulates faster than in most U.S. cities.
- Check PVC slats for UV brittleness each spring. Slats that crack when you flex them slightly need replacement; sun-bleached color alone is cosmetic.
- Inspect coastal properties (Santa Monica, Culver City near the beach) for salt-accelerated corrosion on the chain-link wire itself, which can cause slats to shift or drop.
- After a Santa Ana wind event, walk the fence line and reseat any slats that have been pushed out of alignment.
Typical lifespans:
- PVC/HDPE slats: 10–15 years in moderate conditions; 7–10 years on south-facing fences with full sun exposure in the San Fernando Valley.
- Aluminum slats: 20+ years with minimal maintenance; the preferred choice for long-term installations.
- Composite or hedge-style inserts: 8–12 years depending on UV exposure and irrigation overspray.
Removal tip: Slats are designed to come out as easily as they went in. Start at one end, grip the top of the slat, and pull upward while angling slightly. Do not yank straight out; the angled extraction prevents bending the wire. PVC slats in good condition can be reused or donated. Aluminum slats are recyclable at most LA-area metal recycling facilities.
Pro Tip: When replacing a section rather than the full fence run, photograph the existing slat orientation before removal. The photo takes 10 seconds and eliminates guesswork when you reinstall.
When should you hire a professional instead of DIY?
Most homeowners can handle a straightforward slat installation on a sound, level fence. But several conditions shift the calculus clearly toward professional installation.
Hire a pro when:
- Posts rock, lean, or show visible concrete heave at the base
- The property sits on a hillside or exposed coastal lot where wind loads are a real concern
- The fence runs across stepped or significantly uneven terrain
- Your HOA or local jurisdiction requires a permit for the work (some LA neighborhoods do for structural fence modifications)
- You want a seamless, high-end finish consistent with the surrounding property in Beverly Hills, Santa Monica, or Brentwood
- The project involves replacing posts, re-setting footings, or adding intermediate posts
- Gate clearance needs to be precisely maintained after slatting
What professionals handle differently:
- Post reinforcement and re-setting in concrete, with proper bracing and cure time
- Custom cuts at every gate, corner, and grade change for a uniform appearance
- Bottom-lock channel installation with precise leveling across uneven ground
- Permit guidance and documentation for LA fence height rules and local compliance
- Premium material sourcing and warranty-backed installation for custom fencing on upscale LA properties
Clients in Bel Air, West Hollywood, and Pasadena frequently choose professional installation not because the DIY steps are beyond them, but because the visual uniformity and structural assurance are worth the investment on a high-value property.
Key Takeaways
Adding privacy slats to a chain-link fence is a viable DIY project when posts are sound, but wind load and post integrity must be assessed before choosing a high-privacy slat rating.
| Point | Details |
|---|---|
| Inspect posts first | Push each post; if it moves more than half an inch, re-set it before adding slats. |
| Match slat to mesh size | Confirm diamond size (2-inch vs. 1-3/4-inch) before ordering to prevent fit failures. |
| Choose privacy rating by exposure | Use 75%–85% slats on exposed LA lots; reserve 95%–100% for sheltered, reinforced fences. |
| Budget $25–$80 per 10 linear feet | PVC slats run $25–$50 per box; aluminum runs $40–$80, both covering roughly 10 linear feet. |
| Fence-gate-estimator for LA pricing | Use the instant cost calculator at Fence-gate-estimator for accurate local material and labor estimates. |
The case for knowing your limits before you start
There is a version of this project that goes perfectly: sound posts, flat ground, standard 2-inch mesh, and a box of self-locking slats. Two hours later, you have a private yard. That version is genuinely achievable for most homeowners, and the DIY path is the right call.
The version that goes wrong is more instructive. A homeowner on a hillside lot in Studio City installs 95% privacy slats on posts that were set 15 inches deep in sandy soil. The fence looks great for six months. Then a Santa Ana wind event arrives, and three posts fail at the footing. The repair cost is multiples of what professional installation would have cost upfront.
The honest trade-off is this: the slat installation itself is simple. The structural assessment that should precede it is where most DIYers underinvest. Checking post depth, measuring footing diameter, and honestly evaluating wind exposure takes 20 minutes and determines whether your project is a weekend afternoon or a liability. For properties in exposed or premium LA neighborhoods, that 20-minute assessment is the most valuable step in the entire process, and it is exactly what a professional site visit delivers.
Get an instant cost estimate for your LA fence project
Slat installation is a smart, cost-effective privacy upgrade, but the total project cost shifts significantly once post reinforcement, custom cuts, or permit work enters the picture. Fence-gate-estimator gives Los Angeles homeowners an immediate, realistic budget figure based on actual local material and labor rates, without waiting for a contractor callback.
Use the Fence & Gate Installation Cost Calculator to get your instant estimate now. For properties in Beverly Hills, Brentwood, or Santa Monica where structural reinforcement or a premium finish is part of the scope, the custom fencing service page outlines what a professional installation includes: post reinforcement, precise alignment across uneven terrain, permit guidance, and a warranty-backed finish. Request an on-site assessment directly from that page to get firm pricing and a clear project timeline.
Sources and further reading
- Comparison for chain-link fence slats
- Chain link fence slat types and installation notes
- How To Install Privacy Slats In Chain Link Fence: A DIY Guide
- The Ultimate Actionable Guide to Fence Privacy Slats
FAQ
How do I add more privacy to an existing fence?
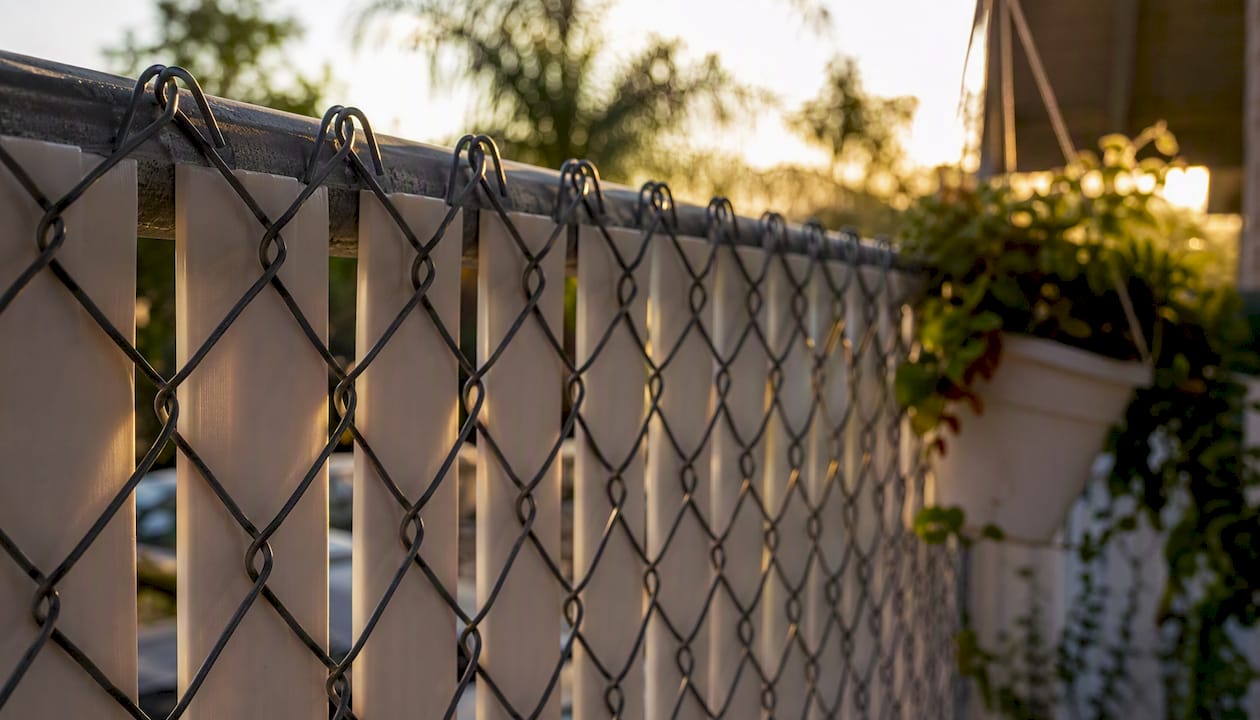
The fastest method is to insert vertical privacy slats through the chain-link mesh diamonds, which requires no special tools and can be completed in a single afternoon. For a more finished look, bottom-lock slat systems or pre-inserted privacy fabric panels offer higher coverage with a cleaner edge.
Are privacy slats easy to install?
Yes, for a standard residential chain-link fence with sound posts and level ground. Vertical-insert and self-locking slat styles require only basic tools and no prior fencing experience; the main preparation step is confirming that your mesh size matches the slat profile before ordering.
Can you put slats on both sides of a fence?
You can, but double-sided slatting doubles the wind load on your posts. Use a lower privacy-rated slat (75%–85%) on each side and confirm posts are set at least 24 inches deep in concrete before proceeding on any exposed property.
What is the most affordable way to make my fence private?
PVC vertical-insert slats are the most cost-effective option, typically running $25–$50 per box covering roughly 10 linear feet. They install without professional help and are widely available at fencing suppliers and home improvement stores across the Los Angeles area.
Do privacy slats require a permit in Los Angeles?
Slat installation on an existing fence generally does not require a permit in most LA jurisdictions. However, if the project involves replacing or adding posts, altering fence height, or modifying a fence in a designated historic or HOA-governed area, a permit may be required. Check LA fence height rules or consult your local building department before starting any structural work.