How to Add a Built-In Bench to Your Fence
By BabyLoveGrowth AI
Yes — you can attach a safe, long-lasting built-in bench to an existing fence by anchoring a framed seat platform directly to the fence posts or reinforced rails, and then finishing with weatherproof materials. For a typical 4–6 ft bench, expect a moderate DIY project: one weekend for the build, another half-day for finishing. Difficulty sits at moderate, mainly because post inspection and structural fastening require precision. The core materials are pressure-treated 2x4s or 2x6s, stainless or hot-dipped galvanized hardware, and an exterior-grade stain or penetrating oil. If your bench will double as a guardrail, the backrest must meet local guardrail heights (typically 36–42 in) and the structure must resist a 200-pound horizontal force per IRC-aligned standards.
Key Takeaways
Anchoring to fence posts rather than rails is the single most important structural decision in any fence bench installation.
| Point | Details |
|---|---|
| Anchor to posts, not rails | Lag screws or carriage bolts into concrete-set posts carry seating loads safely. |
| Use corrosion-resistant hardware | Stainless 304/316 or hot-dipped galvanized fasteners prevent rust failure, especially near the LA coast. |
| Build the frame first, then attach | Assembling the seat frame off-site and carrying it to the fence produces a squarer, stronger result. |
| Provide drainage in every design | Space seat slats 1/8–3/16 in apart and raise any storage box floor on cleats to prevent rot. |
| Fence-gate-estimator for pro work | When the fence needs upgrading or a permit-ready build, use the LA cost estimator for an instant local quote. |
Table of Contents
- What do you need to build a bench attached to a fence?
- How do you inspect your fence and plan the bench layout?
- How do you build the bench frame before attaching it to the fence?
- How do you attach the bench to wood, vinyl, or metal fences?
- How do you cut and fasten the seat boards and add storage?
- How do you finish and weatherproof an outdoor fence bench?
- Is your bench structurally safe? Load checks and when to hire a pro
- How long does it take and what does it cost?
- What most DIYers get wrong about fence bench projects
- Ready to get a professional estimate for your fence project?
- Sources
- FAQ
What do you need to build a bench attached to a fence?
Gathering everything before you start saves at least one frustrating mid-project hardware run. Here is a complete checklist organized by category.
Lumber and materials
- Framing: 2x4 or 2x6 pressure-treated lumber for the seat frame, legs, and stretchers. For a visible seat surface, Western red cedar, cypress, or white oak resist decay naturally and look far better than bare PT pine.
- Seat boards: 2x6 cedar or composite decking slats, cut to bench length.
- Support posts: 4x4 PT posts if you need to add independent legs or sister a weak fence post.
- Optional storage: 3/4-in exterior-grade plywood for a storage box floor and sides, plus a continuous piano hinge or two heavy-duty exterior hinges for the lid.
- Sealant/stain: Penetrating exterior stain or natural oil (not a film-forming varnish).
- Caulk: Acrylic-latex exterior caulk for sealing trim seams and small gaps.
Hardware
Corrosion resistance is non-negotiable outdoors. For coastal or poolside properties in Santa Monica, Malibu, or Bel Air, step up to 316 stainless.
- Structural fasteners: 3-in and 3-1/2-in exterior structural screws (GRK RSS or equivalent) for frame assembly.
- Post anchoring: 1/2-in lag screws (3-in minimum embedment) or 1/2-in carriage bolts with washers for through-post connections.
- Seat slats: 2-1/2-in stainless or hot-dipped galvanized deck screws for fastening seat boards.
- Hinges (storage): Stainless continuous piano hinge or two 4-in exterior strap hinges rated for outdoor use.
- Backing plates/washers: 1/4-in fender washers behind lag screws when pulling into softer wood.
Tools
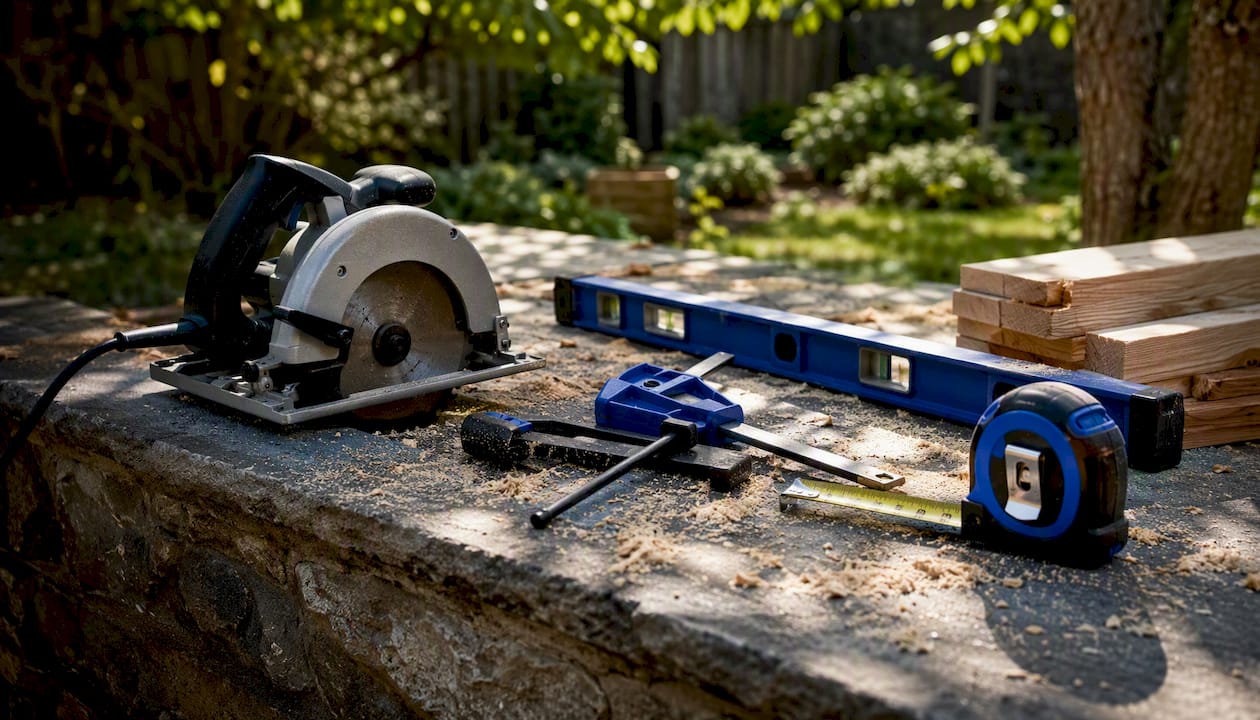
Circular or miter saw, drill/driver, countersink bit, clamps (at least four), 4-ft level, tape measure, speed square, impact driver or socket wrench for lag bolts. A pocket-hole jig is optional but speeds up frame assembly considerably.
Pro Tip: Ask your local hardware store specifically for “coastal-grade” or “marine-grade” stainless fasteners if you are within a few miles of the Pacific. Standard zinc-plated screws will rust within one season in salt air.
How do you inspect your fence and plan the bench layout?
Skipping inspection is the single most common mistake on fence bench projects. A bench anchored to a rotting post is a liability, not a feature.
- Walk the fence line and mark post locations. Posts are typically spaced several feet apart. Probe each post base with a screwdriver; if it sinks more than 1/4 in, the post has rot and needs sistering or replacement before you attach anything.
- Confirm post material and size. 4x4 wood posts support a bench well. 3-1/2-in nominal vinyl posts may need internal steel reinforcement or a separate leg system. Metal posts (square tube or round pipe) require U-bolt clamps rather than screws.
- Check post anchoring. Posts set in concrete are your best attachment points. Posts simply tamped in soil may shift under lateral load; plan to add independent legs to the ground for those spans.
- Measure your bench zone. Record the total length available, the distance from the fence face to any obstructions (garden beds, pathways), and the height of the lowest fence rail. A comfortable seat height is 15–17 in from grade; seat depth should be 15–18 in. Minimum useful bench length is 4 ft.
- Identify your attachment points. Mark the two nearest posts that bracket your bench zone. These are your primary anchor points. If posts are more than 6 ft apart, plan a mid-span leg or add a third attachment cleat to a reinforced rail.
- Photograph everything. Photos of post bases, rail connections, and fence face give you a reference during the build and are useful if you later consult a contractor or pull a permit in Los Angeles. The terrain and site conditions of your yard can also affect how you anchor independent legs.
- Sketch a simple plan. Draw the fence face, mark post centers, note bench length and depth, and label where lag screws will land. No drafting skills needed — a rough sketch on graph paper is enough.
How do you build the bench frame before attaching it to the fence?
Building the frame as a standalone unit first, then carrying it to the fence, is far easier than assembling it in place. Home Depot’s bench guide confirms this sequence: build the base, fit the seat, countersink pilot holes, then fasten.
- Cut the two seat rails to your bench length (e.g., 60 in for a 5-ft bench) from 2x4 or 2x6 PT lumber.
- Cut the two end rails to your seat depth minus 3 in (to account for the rail thickness on each end). For an 18-in-deep bench, cut end rails at 15 in.
- Assemble the rectangular seat frame with two 3-in structural screws at each corner. Clamp the pieces square before driving fasteners.
- Add a center stretcher if the bench exceeds 4 ft. A single 2x4 mid-span stretcher prevents the seat from flexing under load.
- Cut and attach the front legs. For a 16-in seat height, legs are typically 14–15 in (the seat board adds the remaining height). Attach each leg to the front corners of the frame with two 3-1/2-in structural screws or a carriage bolt per leg for maximum rigidity.
- Add diagonal blocking or corner gussets at each leg-to-frame joint to resist racking. A 6-in triangle of 3/4-in plywood glued and screwed works well.
- Dry-fit the frame against the fence before final fastening. Confirm it sits level and the back edge aligns with your marked attachment points on the posts.
This prevents splitting near board ends and stops water from pooling around fastener heads — two of the most common causes of early rot.*
The Lowe’s slat-back bench plan and Milltree Designs’ guide both recommend carriage bolts at structural joints where the frame meets legs — use them anywhere you want a connection that will not loosen over time.
- Use clamps to hold the frame square while screws are driven.
- Work on a flat surface (a garage floor or driveway) for accurate assembly.
- Have a helper hold the frame upright when you carry it to the fence.
How do you attach the bench to wood, vinyl, or metal fences?
The right fastening method depends entirely on what your fence is made of. Getting this wrong is the difference between a bench that lasts a decade and one that pulls away from the fence after the first rainy season.
Wood fences
Anchor the back of the seat frame to the fence posts with 1/2-in lag screws, minimum 3-in embedment into solid post wood. Two lags per post, spaced vertically, prevent rotation. For posts you can access from both sides, a 1/2-in carriage bolt through the post with a washer and nut is stronger than any lag. Find solid post faces by tapping the fence boards — the sound changes from hollow to solid directly over a post. For post anchoring best practices, the post must be set in concrete for the attachment to carry full seating loads.
Vinyl fences
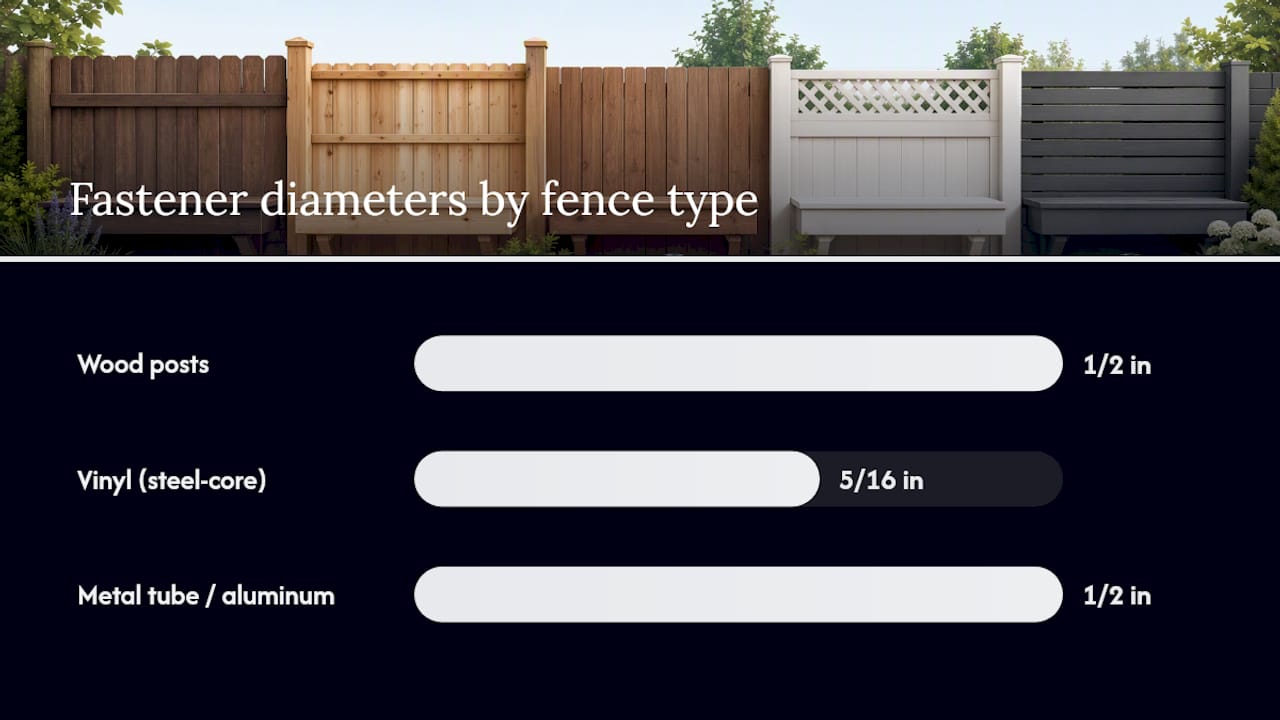
Never screw directly into thin vinyl rails — they crack and the connection fails quickly. Instead, cut a 2x4 or 2x6 wood block to fit snugly inside the vinyl rail cavity, slide it in as a backer, then drive screws through the vinyl into the backer. Alternatively, bolt a separate wood ledger directly to the vinyl posts (which typically have a steel core), bypassing the rails entirely. Space fasteners no more than 16 in apart along the ledger.
Metal and chain-link fences
- Square or round tube steel posts: Use 1/2-in U-bolts or heavy-duty post clamps to attach a horizontal ledger board to the post face. The ledger then supports the back of the seat frame.
- Chain-link: The mesh carries zero structural load. Attach only to the chain-link posts using U-bolts, or install independent legs anchored to the ground with post anchors or concrete footings.
- For aluminum fence attachment, the same U-bolt or clamp approach applies; see aluminum fence construction details for hardware sizing by post gauge.
Coastal and LA-specific note: Properties near the coast in Santa Monica, Culver City, or Brentwood should use 304 or 316 stainless U-bolts and hardware throughout. Add fender washers behind every lag to distribute load and prevent the fastener from pulling through softer wood over time.
| Fence type | Primary attachment method | Fastener recommendation |
|---|---|---|
| Wood (posts in concrete) | Lag screws or carriage bolts into posts | 1/2-in x 3-1/2-in lag or carriage bolt, 2 per post |
| Vinyl (steel-core posts) | Wood backer inside rail + screws, or ledger bolted to post | 5/16-in structural screws into backer; 1/2-in bolt to post |
| Metal tube / aluminum | U-bolt clamps to post, ledger board attached | 1/2-in stainless U-bolts with locking nuts |
| Chain-link | Independent legs to ground; U-bolts to posts only | Post anchors or concrete footings for legs |
How do you cut and fasten the seat boards and add storage?
With the frame attached to the fence, the seat top goes on next.
- Cut seat boards to bench length from 2x6 cedar or composite decking. Plan for 3–5 boards across the 15–18-in depth.
- Space boards 1/8–3/16 in apart for drainage and seasonal expansion. A 16d nail or a 1/8-in drill bit used as a spacer keeps gaps consistent.
- Fasten each board with two stainless screws per framing member below, pre-drilled and countersunk. Drive screws at a slight angle away from board ends to reduce splitting risk.
- For a hinged storage lid: Build a plywood box frame under the seat before attaching seat boards. Attach a continuous piano hinge along the back edge of the seat top so the entire lid lifts as one piece. Add a lid support or soft-close lid stay to prevent the lid from slamming back.
- Drill two or three 3/4-in drainage holes in the plywood floor of any storage box, and raise the box floor on 1-in cleats so water drains rather than pools.
Drainage and ventilation checklist:
- Seat slat gaps: 1/8–3/16 in minimum.
- Storage box floor: raised 1 in on cleats, with drainage holes.
- No solid bottom flush against concrete or soil (traps moisture).
- Lid seal: not airtight — leave a small gap at the front edge for air circulation.
For safety on hinged lids, add a simple barrel bolt or hasp latch so the lid cannot open accidentally when someone sits on it.
How do you finish and weatherproof an outdoor fence bench?
Finish choice has a bigger impact on bench longevity than lumber species. Ana White’s guidance is direct: avoid film-forming finishes outdoors. Varnishes and polyurethane trap moisture beneath the film, which leads to peeling and rot faster than an unfinished board. Use penetrating stains or natural oils instead — they let the wood breathe, flex with seasonal movement, and are easy to reapply without stripping.
- For cedar or white oak: Apply a penetrating exterior oil or semi-transparent stain. Two coats on bare wood, with a light sand between coats.
- For pressure-treated lumber: Let new PT wood dry for at least 30 days before finishing. Apply a water-repellent preservative or penetrating stain rated for PT wood.
- For composite decking seat boards: Follow the manufacturer’s sealer recommendation; most composites need only a UV-blocking cleaner-sealer, not a stain.
- Hardware: Stainless fasteners need no treatment. Hot-dipped galvanized bolts benefit from a coat of cold-galvanizing compound on any cut or abraded surfaces.
Pro Tip: Apply finish when the temperature is above 55°F with no rain forecast for at least 48–72 hours. In Los Angeles, late spring and early fall hit that window reliably. Avoid finishing during the Santa Ana wind season when dust contamination is high.
Annual maintenance schedule:
- Inspect all fasteners and tighten any that have loosened.
- Probe post bases and frame joints for soft spots indicating rot.
- Clean the bench surface with a mild soap and water wash, rinse, and let dry fully.
- Reapply penetrating stain or oil per the product’s recommended interval (typically every 1–2 years for cedar, annually for pine).
Is your bench structurally safe? Load checks and when to hire a pro
A bench that looks solid can still fail under load if the attachment points are undersized or the fence posts are compromised.
Structural checklist
- Confirm posts are set in concrete and show no rot at grade.
- Verify lag screws or carriage bolts are fully seated with no gap between hardware and wood.
- Check that the seat frame does not rack side-to-side when pushed laterally.
- Confirm seat slat fasteners are tight and no boards have lifted at the ends.
- If the bench backrest reaches 36 in or higher, verify the entire assembly can resist lateral force per guardrail load standards.
Simple load test
- Apply 250 lb of weight (bags of sand or concrete work well) evenly across the seat. Hold for 5 minutes and observe.
- Push laterally on the seat frame with moderate force. Acceptable: slight flex that springs back. Fail: any creaking at the fence attachment, visible post movement, or fastener pull-through.
- A properly built bench with correct hardware can support several hundred pounds when assembled with stainless or galvanized fasteners and anchored to posts in concrete.
When to hire a professional
- Visible rot in any supporting fence post.
- Posts not set in concrete (tamped-soil posts shift under lateral load).
- Bench span exceeds 6 ft without a mid-span leg or reinforced post.
- The bench backrest must meet guardrail code height (36–42 in) for a raised deck or elevated surface.
- You want a permit-ready integrated bench-rail system for a Los Angeles property in Pasadena, West Hollywood, or Brentwood, where inspectors actively review deck and fence modifications.
How long does it take and what does it cost?
Time breakdown for a 4–6 ft bench
| Phase | Estimated time |
|---|---|
| Inspection and planning | 1–2 hours |
| Frame build (off-site) | 3–5 hours |
| Fence attachment | 1–2 hours |
| Seat top and storage | 1–2 hours |
| Finishing (two coats) | 2–3 hours + drying time |
| Total | 8–14 hours across 1–2 weekends |
Materials cost ranges
- Budget (PT lumber + basic hardware): $80–$150 for a 5-ft bench.
- Mid-range (cedar seat boards + stainless hardware): $200–$350.
- Premium (composite decking + 316 stainless + storage box): $400–$600+.
These figures cover materials only. If you hire a carpenter or fence contractor in Los Angeles, labor typically adds $300–$700 for a project of this scope, depending on complexity and neighborhood. For a detailed local estimate that accounts for your specific fence type and materials, the Fence-gate-estimator cost calculator gives you an instant breakdown based on current LA-area rates.
What most DIYers get wrong about fence bench projects
The biggest mistake is treating the fence as a structural wall when it often is not. Most residential fences in Los Angeles — whether in Sherman Oaks, Encino, or Studio City — are built to define a boundary, not to carry seating loads. The posts are the only reliably structural element, and even those vary widely. I have seen projects where the homeowner drove lag screws into fence rails that were barely 1-1/2 in thick, expecting them to hold a full bench. They do not.
The shortcut that actually works: build the bench frame with its own front legs that reach the ground, and use the fence posts only to stabilize the back edge. That way, the ground carries the vertical load and the fence handles only the lateral connection. It is a faster build, requires less inspection of the fence condition, and holds up better over time.
For Los Angeles homeowners, one practical note: most fence bench projects fall below the threshold for a building permit, but if your bench integrates with a raised deck or the backrest exceeds 30 in, check with the LA Department of Building and Safety before you start. A quick call saves a costly correction later.
Start with a short bench — 4 ft is enough to prove the concept and test your attachment points. If the fence shows any structural weakness during inspection, stop, and call a pro before proceeding.
Ready to get a professional estimate for your fence project?
Fence-gate-estimator gives Los Angeles homeowners an instant, accurate cost breakdown for fence and gate work — no phone tag, no waiting for a contractor to call back. If your bench project reveals that the fence itself needs upgrading, or if you want a permit-ready integrated bench-rail system, the custom fencing service connects you with professional installers who know local code requirements in Beverly Hills, Brentwood, Pasadena, and across the LA area.

The estimator uses current local material and labor rates to generate a detailed cost breakdown for wood, aluminum, composite, and other fence types. You can compare options, factor in terrain and site conditions, and get a realistic budget in minutes. When you are ready to move from DIY planning to professional installation, get your instant estimate and a pro will follow up with a site-specific quote.
Sources
- Built-In Deck Seating as Railing: A Smart Space-Saving Design for 2026 - Silent Products
- How to build an outdoor bench – Home Depot
- DIY Outdoor Bench – Easy 2x4 Firepit Seating Plan | Ana White
- Choosing Wood for Outdoor Projects: Five Fast Facts - Rockler
Callout: Include labeled photos or diagrams of the frame assembly and post attachment points wherever possible. If your bench backrest reaches guardrail height, consult the LA Department of Building and Safety or a licensed contractor before finalizing the design.
FAQ
How do you build a basic built-in bench?
Build a rectangular seat frame from 2x4 or 2x6 lumber, attach front legs, then anchor the back edge to fence posts with lag screws or carriage bolts. Space seat slats 1/8–3/16 in apart for drainage and finish with a penetrating exterior stain.
Can you add a privacy screen to an existing fence?
Yes — attach lattice panels or vertical board extensions to the existing fence posts using structural screws or carriage bolts. The posts must be in solid condition and set in concrete to support the added wind load.
How do you build an inexpensive outdoor bench?
A simple 2x4 pressure-treated bench with basic galvanized hardware typically costs $80–$150 in materials for a 5-ft span. Keep costs down by using PT lumber for the frame and reserving cedar only for the visible seat boards.
How do you attach a bench to a fence without damaging it?
For vinyl or metal fences, use wood backers inside the rail cavity or U-bolt clamps on the posts rather than screwing directly into the fence material. This distributes the load to the post and avoids cracking or deforming the fence panels.