How to Choose Gate Intercom Placement: An Installer's Guide
By BabyLoveGrowth AI
Mount your gate intercom on the driver’s side of the lane, with the operable point at or below 48 inches above finished grade, positioned outside the gate’s swing arc with a clear 30"×48" approach space. That single decision covers accessibility, driver convenience, and camera sightline in one move. Knowing how to choose gate intercom placement correctly before the first hole is drilled saves you from costly remounts, permit headaches, and security blind spots.
Non-negotiables to confirm on-site before installation:
- Driver-side mounting — intercom post centered on the driver’s window, not the passenger side
- Operable point ≤ 48 in above finished grade (ADA maximum for primary controls)
- Clear 30"×48" floor space outside the gate swing arc for wheelchair or pedestrian approach
- Camera aimed at driver face height — typically 43–48 in above grade for a seated driver
- Signal test completed — Wi-Fi, PoE reach, or cellular bars confirmed at the mount point
- Signage visible from the street so visitors know where to stop and how to call
Key Takeaways
Correct gate intercom placement requires driver-side mounting at or below 48 inches above finished grade, a clear 30"×48" approach outside the gate swing, and a camera aimed at driver face height — confirmed by an on-site survey before hardware is ordered.
| Point | Details |
|---|---|
| Operable point height | Mount the call button at or below 48 in above finished grade to meet ADA operable-part guidance. |
| Driver-side positioning | Place the intercom on the driver’s side of the lane so visitors reach it without leaving the vehicle. |
| Clear approach and swing clearance | Maintain a 30"×48" unobstructed space outside the gate’s full swing or travel path. |
| Camera and audio testing | Run day/night sightline checks and an audio test at typical vehicle stop distance before finalizing the mount. |
| Fence-gate-estimator | Use the online cost estimator to budget your Los Angeles gate intercom and automation project before installation. |
Table of Contents
- Why gate intercom placement affects more than convenience
- How to choose gate intercom placement: practical rules for the field
- What height should a gate intercom be mounted?
- How should you position the camera and microphone?
- Wiring, power, and connectivity: which option fits your site?
- How placement changes by gate type
- Common installation mistakes and how to avoid them
- Pre-install survey checklist: measurements and field checks
- An installer’s honest perspective on placement priorities
- Get an accurate estimate for your Los Angeles gate intercom installation
- Sources
- FAQ
Why gate intercom placement affects more than convenience
Poor placement is the root cause of most intercom failures, and the equipment itself is rarely to blame. Industry installers consistently report that wrong height, sun glare, and traffic noise account for the majority of recurring problems — not camera resolution or speaker wattage.
The real-world consequences are specific:
- A camera mounted too high captures the roof of a vehicle instead of the driver’s face, making identity verification unreliable regardless of how many megapixels the sensor has.
- A button placed at 60 inches above grade excludes wheelchair users and may trigger an ADA complaint on commercial or multi-tenant residential properties.
- A unit installed inside the gate’s swing path will be struck and damaged within months, adding repair costs and downtime.
For Los Angeles properties, two local factors compound these risks. First, the sun angle in neighborhoods like Brentwood and Bel Air means a west-facing camera will be washed out every afternoon during peak arrival times. Second, coastal moisture in Santa Monica and the marine layer common across the Westside accelerates corrosion on units without proper weatherproofing. Getting the home security setup right from the start pays dividends for years.
How to choose gate intercom placement: practical rules for the field
These rules work whether you are planning a new installation or relocating an existing unit. Print this list and walk the site before ordering hardware.
- Driver-side for vehicle lanes; pedestrian-side for walkways. A driver should never reach across the center console to press a button.
- Operable point height: center the call button between 15 in and 48 in above finished grade. The 48-inch ceiling is the ADA operable-part maximum for primary controls.
- Clear approach: maintain a 30"×48" unobstructed floor space at the intercom, oriented for forward or side approach, and keep it entirely outside the gate’s swing arc.
- Camera angle: tilt the lens slightly downward to capture the driver’s face at approximately 43–48 in above grade. Avoid pointing the camera directly into the morning or afternoon sun.
- Stop-point distance: place the intercom post so a vehicle stopping at the unit is not blocking the public sidewalk or street.
- Power and connectivity: use PoE/ethernet when conduit to the gate already exists; choose cellular for remote or retrofit sites where trenching is cost-prohibitive. SIP/PoE intercoms require network infrastructure on-site; cellular units remove that dependency but require a carrier signal check first.
Pro Tip: Before ordering a pedestal post, park your own vehicle at the planned stop point and measure the distance from the driver’s window to the ground. That measurement tells you exactly where to center the call button.
What height should a gate intercom be mounted?
The Access Board’s operable-parts guidance sets the maximum mounting height for a primary operable point at 48 inches above finished ground for both forward and side reach. The allowable range runs from 15 in to 48 in above the finished surface.
Some manufacturers list a recommended range of 48–57 inches for vehicle-lane intercoms, targeting the average driver’s window height. That range works for driver reach from a car window, but it exceeds the ADA maximum for the primary operable point. The practical solution is to mount the call button at 48 inches, which satisfies both the ADA ceiling and the typical driver reach zone simultaneously.
For pedestrian access, the ADA design standards require at least one accessible route connecting public streets and parking to the accessible entrance. That means your pedestrian intercom must sit on a compliant path with the operable point at or below 48 in and a clear 30"×48" floor space for a stationary wheelchair.
When you have both vehicle and pedestrian traffic at the same gate:
- Mount the vehicle-lane intercom at 48 in on a pedestal in the driver lane.
- Install a separate pedestrian unit at 42–48 in on the gate column or adjacent wall, accessible from the sidewalk.
- Measure from finished grade, not from the base of the post or a raised curb.
- Mark the target height on a piece of tape on the post before drilling — it takes 30 seconds and prevents remounting.
Key measurement: the Access Board’s technical guide clarifies that clear floor space can be oriented for either forward or side approach, and nominal centering of the control within that space is advisable.
How should you position the camera and microphone?
Camera placement determines whether your intercom actually identifies visitors or just records blurry windshields. Video intercoms with properly positioned cameras materially reduce entry delays and false approvals compared with audio-only units, but only when the lens is aimed correctly.
Camera positioning rules:
- Mount the camera so the center of the field of view lands at approximately 43–48 in above grade, capturing the driver’s face through the window rather than the top of the vehicle.
- Tilt the lens 10–15 degrees downward. A perfectly horizontal lens misses seated drivers; excessive downward tilt captures the door panel instead of the face.
- Avoid a camera orientation that places the sun directly in the field of view during the hours your gate sees the most traffic. For west-facing gates in Pasadena or Studio City, afternoon arrivals will wash out a camera without Wide Dynamic Range (WDR).
- Use an anti-glare hood on south- and west-facing installations. A 2-inch hood costs very little and eliminates the most common cause of daytime identification failure.
Microphone placement:
- Position the mic as close to the driver window as practical — typically 18–24 in from the vehicle stop point.
- Orient the unit so the microphone faces away from the primary traffic noise source (the street or a nearby HVAC unit).
- Avoid mounting directly behind a perforated metal screen without acoustic testing; some decorative screens attenuate high frequencies and make voices sound muffled.
Pro Tip: Run a live audio test at typical vehicle speeds before finalizing the mount. Have someone drive up slowly while you listen on the receiving end. Wind noise at 5–10 mph is the most common audio complaint installers miss during static bench tests.
Wiring, power, and connectivity: which option fits your site?
Power and connectivity choices directly affect where the intercom can physically go. Locking in a mount location before confirming power availability is one of the most expensive planning mistakes on gate projects.
Connectivity options at a glance:
- PoE/ethernet: most reliable for permanent installations where conduit already runs to the gate. Requires a PoE switch within cable reach (typically up to 328 ft on Cat5e/Cat6). No recurring carrier fees.
- Wi-Fi: practical when a strong managed network reaches the gate. Signal strength degrades through masonry walls and over distance; test with a phone at the mount point before committing.
- Cellular (4G/LTE): the right choice for remote gates, retrofit projects, or sites where trenching costs are prohibitive. Carrier dead zones are a real risk — check signal at the exact mount location, not just nearby.
SIP/PoE intercoms need on-site network infrastructure; cellular units trade that dependency for a monthly carrier cost. Neither is universally better — the site dictates the answer.
Power considerations:
- Confirm the nearest circuit breaker location and the distance to the gate post. Trenching in Los Angeles typically runs $8–$15 per linear foot depending on soil conditions and permit requirements.
- Solar with battery backup is viable for low-traffic residential gates in sunny LA neighborhoods, but size the battery for at least 3 days of autonomy to cover overcast stretches.
- Install outdoor-rated conduit (Schedule 40 PVC minimum) and a surge protector on every conductor feeding the intercom. Lightning and power spikes are the leading cause of premature intercom failure in exposed installations.
- Check with your local jurisdiction — Los Angeles requires permits for new electrical circuits, and HOAs in communities like Beverly Hills and Bel Air often have additional approval requirements for visible exterior hardware.
How placement changes by gate type
The mechanics of your gate determine where the intercom can safely go. Getting this wrong means a damaged unit, a liability risk, or a gate that can’t open fully.
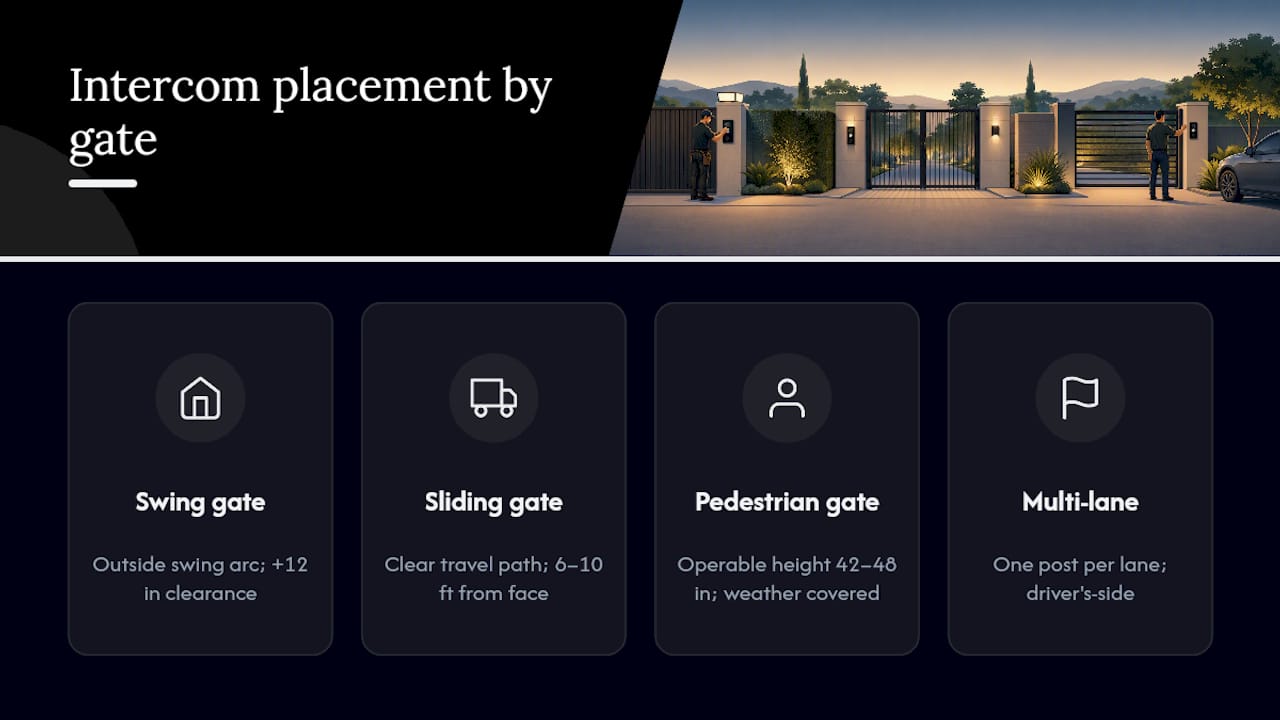
Swing gates require the intercom post to sit entirely outside the swing arc. Measure the gate’s full open position and add at least 12 inches of clearance. Pedestal mounts work well here because they can be positioned at the natural vehicle stop point, which is typically 3–5 feet back from the gate face. For driveway gate layouts with dual swing panels, place the intercom on the driver’s side post or on a standalone pedestal aligned with the driver’s window at the stop line.
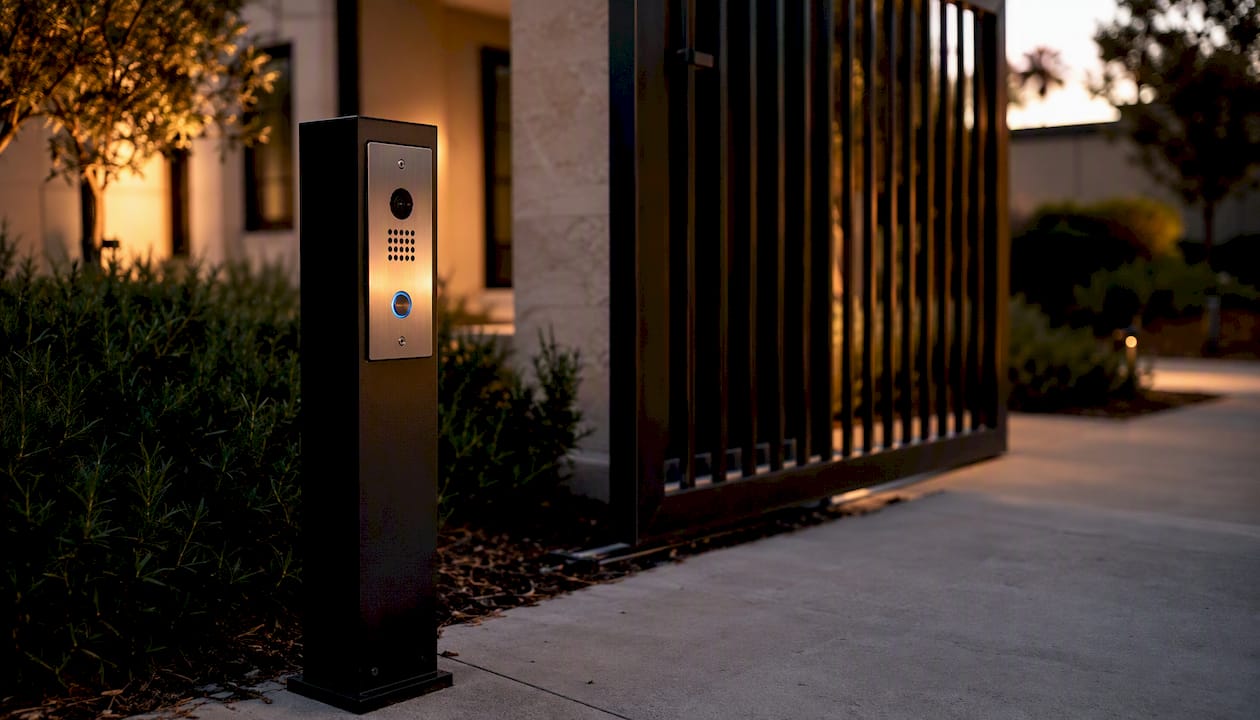
Sliding gates travel laterally, so the intercom post must be clear of the gate’s travel path on both sides. Place the unit where vehicles naturally queue — usually 6–10 feet from the gate face — so the gate can open fully without the vehicle needing to back up.
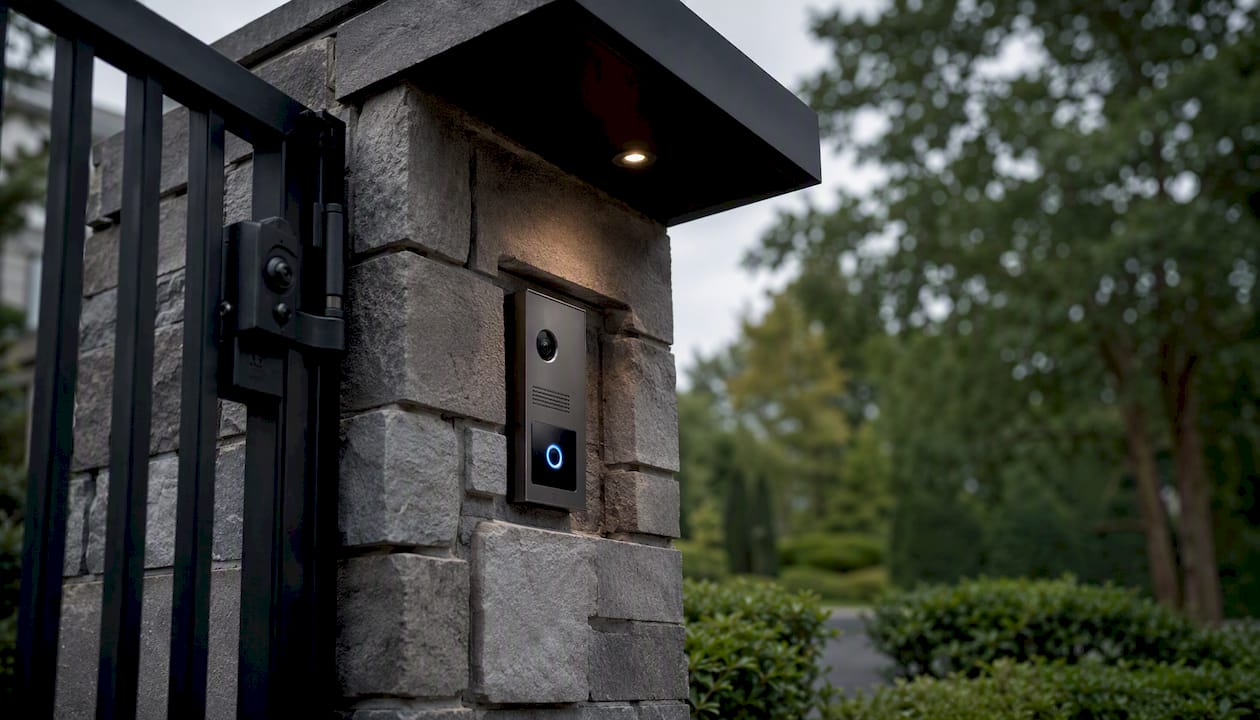
Pedestrian gates call for a lower operable point (42–48 in) and a clear, level approach from the sidewalk. Weather protection matters more here because pedestrian users stand at the unit longer than drivers. A pedestrian gate installation on a covered column or recessed into a pilaster provides natural rain and sun protection.
Multi-lane entrances (common at larger properties in Encino or Glendale) need a dedicated intercom post per lane, positioned on the driver’s side of each lane. Elevated multi-button panels work for controlled-access facilities but are rarely appropriate for residential use. Clear directional signage at the property entrance prevents visitors from stopping in the wrong lane.
Common installation mistakes and how to avoid them
Most intercom problems are preventable. These are the errors installers see most often on service calls.
- Wrong height or wrong side: a unit mounted at 60 in or on the passenger side forces drivers to lean across the vehicle or exit the car. Fix: measure driver-window height before setting the post.
- Camera pointed into direct sun: a west-facing camera without WDR or an anti-glare hood will fail every afternoon. Fix: orient the camera north or east where possible; add a hood on unavoidable sun-facing installations.
- Mounting inside the gate swing or travel path: the gate will strike the unit within weeks. Fix: measure the full gate arc before setting any post.
- Skipping signal tests: assuming Wi-Fi reaches the gate or that cellular coverage is adequate without testing at the exact mount point leads to dead-zone discoveries after installation. Fix: test signal strength at the candidate location before finalizing hardware.
- No visitor signage: a beautifully installed intercom that visitors can’t find causes as many entry delays as a poorly placed one. Fix: add a small directional sign at the property entrance pointing to the intercom location.
- Ignoring ambient noise: mounting near a pool pump, HVAC condenser, or busy street without acoustic shielding degrades audio clarity. Fix: test audio at the site during peak noise hours.
Pre-install survey checklist: measurements and field checks
Complete this survey before ordering hardware. It takes about 45 minutes on-site and prevents the most common scope surprises.
- Measure driver-window height from finished grade at the planned stop point (record in inches).
- Mark the gate swing arc (swing gates) or travel path (sliding gates) and confirm the intercom post location is outside it by at least 12 inches.
- Measure the 30"×48" clear floor space at the planned mount point and confirm it is unobstructed.
- Run a Wi-Fi signal test at the mount point using a phone or laptop (target: –65 dBm or stronger for reliable video streaming).
- Check cellular signal at the mount point on the intended carrier (target: at least 2 bars of LTE).
- Locate the nearest electrical circuit and measure the run distance to the gate post.
- Conduct a camera sightline mockup — hold a camera at the planned height and angle, photograph a vehicle at the stop point, and confirm the driver’s face is in frame.
- Run a day/night audio test — speak from the vehicle stop point at normal volume and confirm clarity at the receiving end.
- Check for sun glare at the camera position during the hours the gate sees peak traffic.
- Review HOA rules and LA permit requirements for exterior hardware and new electrical circuits before finalizing the design.
Pro Tip: Photograph every measurement on-site with a tape measure in frame. Those photos become your installation record and are useful if an HOA or permit inspector asks for documentation.
Site validation before product selection avoids trenching surprises, incompatible controls, and signal dead zones — completing this survey first is the single step that most reduces installation cost overruns.
An installer’s honest perspective on placement priorities
When homeowners ask what matters most in a gate intercom installation, the answer is almost always the same: placement beats product. A mid-range video intercom mounted correctly will outperform a premium unit installed in the wrong spot every time.
The detail most people underestimate is the sun angle. In Los Angeles, a west-facing camera at a Brentwood or Santa Monica property will be blinded by direct sun for two to three hours every afternoon — precisely when most residents arrive home. No amount of camera resolution fixes that. The solution is a 15-degree offset in the mount orientation or a simple anti-glare hood, both of which cost almost nothing compared with a remount.
The second underestimated factor is the relationship between the intercom and the gate automation system. Installers often treat the intercom and the gate operator as separate decisions, but they share power, conduit, and control wiring. Planning both together from the start reduces trenching costs and avoids the awkward placement compromises that happen when the intercom is added as an afterthought.
Finally, the accessibility rules are not just for commercial properties. Any residential gate that a visitor, delivery driver, or service provider needs to operate independently should meet the 48-inch operable-point standard. It is the right design choice regardless of legal obligation.
Get an accurate estimate for your Los Angeles gate intercom installation
Knowing the right placement rules is the first step. Translating those rules into a real installation, with the correct hardware, conduit routing, and permit documentation for your specific Los Angeles property, is where professional guidance pays off.
Fence-gate-estimator gives Los Angeles homeowners an instant, transparent cost estimate for gate and fence projects, including gate automation with integrated intercom systems. The estimator accounts for local labor rates, material choices, and site-specific factors like terrain and automation features, so you get a realistic budget before a contractor sets foot on your property. For properties in Beverly Hills, Pasadena, or West Hollywood where HOA approvals and city permits add steps to the process, having a detailed cost breakdown upfront makes those conversations faster.
Use the Fence-gate-estimator cost calculator to get your project estimate now, then schedule an on-site survey to finalize intercom placement, confirm power routing, and lock in the exact mount position before installation begins.
Sources
These are the primary references behind the placement rules in this guide:
- Access Board — ADA guides: chapter 3, operable parts
- ADA — Law and regs: 1991 design standards
- Gate Intercom Systems: How to Choose + Costs, Wiring, and Best Options (2026) | Swiftlane
- Common intercom installation mistakes and how to avoid them | Gate Auto
FAQ
What height should a gate intercom be mounted?
Mount the operable point at or below 48 inches above finished grade, per the Access Board’s ADA operable-parts guidance. For vehicle lanes, 48 inches also aligns with the typical driver’s window reach zone, making it the practical standard for both accessibility and driver convenience.
Which side of the gate should the intercom go on?
Always mount on the driver’s side of the vehicle lane so the driver can reach the call button without leaving the car. For pedestrian-only gates, position the unit on the latch side of the gate, accessible from the approach path.
What are the most common intercom installation problems?
Wrong mounting height, camera pointed into direct sun, and placement inside the gate swing path are the top three failures installers report. Each is preventable with a 45-minute on-site survey before hardware is ordered.
Should I use a wired or wireless gate intercom in Los Angeles?
Use PoE/ethernet when conduit already runs to the gate for maximum reliability. Choose cellular for remote or retrofit installations where trenching is not practical, but confirm carrier signal strength at the exact mount point before purchasing the unit.
Do I need a permit to install a gate intercom in Los Angeles?
New electrical circuits for gate intercoms typically require an electrical permit from the City of Los Angeles Department of Building and Safety. Properties in HOA communities in Beverly Hills, Bel Air, or Pasadena may also need HOA architectural approval before installation. Confirm both requirements before work begins.